Audio Workshop 8
Using the Microphone

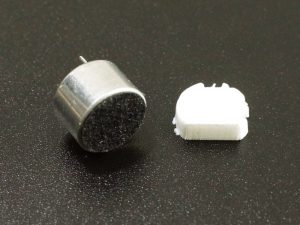
Now is it time to try using the microphone as the source for audio. These microphones are inexpensive mics, so you can expect telephone quality sound.
Prototyping Systems for Teensy 4.1 ‘Fully Stuffed’ versions have microphones added starting July 2022.
If you have an Audio Adapter without a microphone, you can add one to your adapter which requires a little simple soldering and is available below.
Alternatively, you can order the Audio Adapter with pins that now come with the microphone preinstalled.
You can also skip the tutorials that make use of the microphone for now and perhaps come back to them later if / when you have a microphone installed.
Design the Audio System
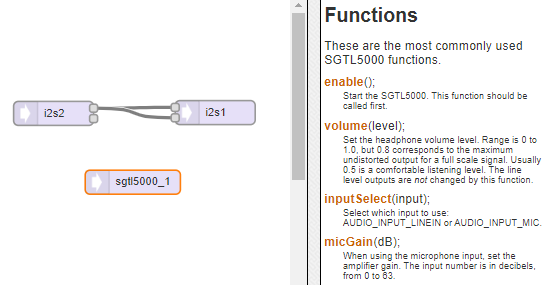
For a first microphone test, use this simple system below. Be sure to use one of the input section i2s objects and one of the output section i2s objects.
The i2s input object provides stereo data, but when the mic is in use both channels are the same data since it is a mono device. Of course you want to connect to both output channels because listening with only 1 ear is unpleasant.
Turn the Design into Code and Use it in a Program
You can copy and paste the code below into an IDE window, or open the File > Examples > Audio > Tutorial > Part_2_04_Microphone_Check as they are the same for this example.
// Advanced Microcontroller-based Audio Workshop
//
// http://www.pjrc.com/store/audio_tutorial_kit.html
// https://hackaday.io/project/8292-microcontroller-audio-workshop-had-supercon-2015
//
// Part 2-4: Using The Microphone


///////////////////////////////////
// copy the Design Tool code here
///////////////////////////////////


//===============================================================================
//  Initialization
//===============================================================================
void setup() {
  Serial.begin(9600);
  AudioMemory(8);
  sgtl5000_1.enable();
  sgtl5000_1.volume(0.5);
  sgtl5000_1.inputSelect(AUDIO_INPUT_MIC);
  sgtl5000_1.micGain(36);
  delay(1000);
}
//===============================================================================
//  Main
//===============================================================================
void loop() {
  // do nothing
}
Now Export and copy & paste the Design Tool code into the program to complete it and verify and upload the program to the Teensy.
If you tap on the microphone or speak into it, you should hear tapping noises or your voice in the headphones.
Modify the Microphone Volume
Until now, every example has simply enabled the SGTL5000 and set the headphone volume. If you review the SGTL5000 documentation in the right panel of the Design Tool, it has a dizzying number of configurable features. By default, the I2S input will use the line level input pins on the top edge of the Audio Adapter. The inputSelect() function is needed to use the microphone.
  sgtl5000_1.enable();
  sgtl5000_1.volume(0.5);
  sgtl5000_1.inputSelect(AUDIO_INPUT_MIC);
  sgtl5000_1.micGain(36);
The main setting to adjust is the micGain(). you can adjust between 0 to 63. Zero will not let you hear anything from this mic and 63 will amplify a lot of static and probably be far too sensitive. Try adjusting this parameter to see the effect.