Determining Unknown I2C Addresses
The I²C interface (usually written as I2C or IIC) is a communication interface that is widely used in electronics.
It is popular as it only requires a couple of lines, has fairly fast communication speeds and allows for multiple devices to sit on the same bus, each with their own unique I2C address.
One of the common things to run into when trying to work with devices that have an I2C interface, is to hook everything up, download the applicable program and have absolutely nothing happen.
If there are no wiring or obvious programming errors, this frequently ends up being a mismatch between what you think the I2C address of the device should be and what it actually is.
Since these addresses can often be set when the product is made, the same basic device may get manufactured with different addresses from one build to another or when they are built by different mfrs.
You can take the tact of trying every possible I2C address, recompiling and downloading the code each time to see if it clears the problem, but that is error prone, time intensive and pretty low on the fun-o-meter of things to be doing.
A MUCH better method is to download a bit of code and have your Arduino tell you what I2C devices it finds attached to it. Nick Gammon has written a nice little utility that does exactly that. It scans through every possible I2C address to see if it gets a response on that address and then reports its findings.
You can find it buried on his website at http://gammon.com.au about half way down the page. It is also provided down below to make it easier to find. If you want to know more about I2C in general, I highly recommend reading the article in the link.
Just copy and paste the code into the Arduino IDE. When it runs, it will report the address of every I2C device that it finds. The output on the Serial Monitor will look similar to the following:
I2C scanner. Scanning …
Found address: 39 (0x27)
Done.
Found 1 device(s).
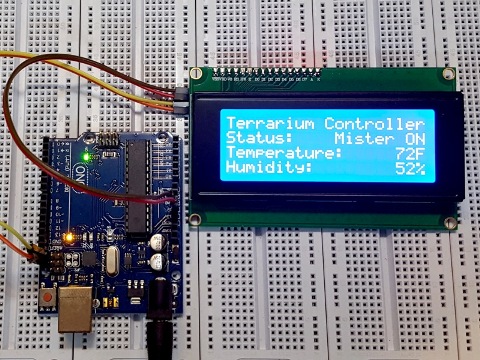
In this case, it found one I2C address at decimal 39 / hex 0x27. This happens to be the LCD display in the picture.
I2C Address Scanner Program
// I2C Scanner
// Written by Nick Gammon
// Date: 20th April 2011
// This scanner looks for any attached I2C addresses.
// Useful for determining address of unknow devices.

#include <Wire.h>

void setup() {
  Serial.begin (9600);

  // Leonardo: wait for serial port to connect
  while (!Serial)
    {
    }

  Serial.println ();
  Serial.println ("I2C scanner. Scanning ...");
  byte count = 0;

  Wire.begin();
  for (byte i = 8; i < 120; i++)
  {
    Wire.beginTransmission (i);
    if (Wire.endTransmission () == 0)
      {
      Serial.print ("Found address: ");
      Serial.print (i, DEC);
      Serial.print (" (0x");
      Serial.print (i, HEX);
      Serial.println (")");
      count++;
      delay (1);  // maybe unneeded?
      } // end of good response
  } // end of for loop
  Serial.println ("Done.");
  Serial.print ("Found ");
  Serial.print (count, DEC);
  Serial.println (" device(s).");
}  // end of setup

void loop() {}