Audio Workshop 2
Play Music
In this section will will replace the annoying beeping with something a little more pleasant. We will play a .WAV file from an SD card inserted into the Audio Adapter SD slot.
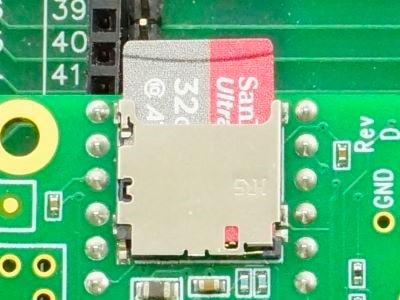
If you are working with the Fully Stuffed version of the Prototyping System for Teensy 4.1, it came with a SanDisk Ultra 32GB SD card with the audio files for these tutorials already preloaded and inserted into the Audio Adapter.
If you are instead putting together your own system, you will need to download the tutorial .WAV files onto an SD card.
SanDisk Ultra is recommended for known good performance but most will work fine for playing a single WAV file.
The WAV files for the tutorials can be found at this link: https://www.pjrc.com/teensy/td_libs_AudioDataFiles.html
The program simply tries to initialize the SD card and if it finds the SD card, it plays the SDTEST2.WAV file on it in a continuous loop. If it can’t initialize the SD card, it continually loops printing “Unable to access the SD card”.
Initializing The LCD
Since we have an LCD, we may as well also display the name of the file being played on it. We need to initialize the LCD anyway as it would otherwise conflict with the SD card on the Audio Adapter.
It uses the ILI9341_T3.h library for LCD control and it loads Arial fonts font_Arial.h for drawing characters on the LCD screen.
The LCD uses Teensy 4.1 pin 40 for chip select and pin 9 for DC (Data / Command). The DC pin determines if the data going to the LCD is Data for it to display or a Command to execute.
The LCD can display in all 4 orientations, so tft.setRotation(3) is used to rotate the image to fit the orientation it has on the baseboard.
#include <ILI9341_t3.h>
#include <font_Arial.h>
// LCD control pins defined by board
#define TFT_CS 40
#define TFT_DC  9

// Use main SPI bus MOSI=11, MISO=12, SCK=13 with different control pins
ILI9341_t3 tft = ILI9341_t3(TFT_CS, TFT_DC);
// Setup LCD screen
tft.begin();
tft.setRotation(3);
We also initialize the touchscreen overlay, but don’t make use of it in this example.
Complete Program
// Advanced Microcontroller-based Audio Workshop
//
// Part 1-3: First "Hello World" program, play a music file
//
// WAV files for this and other Tutorials are here:
// http://www.pjrc.com/teensy/td_libs_AudioDataFiles.html
// These files are included on the SD card shipped with Fully Stuffed baseboards.
//
//  ProtoSupplies.com Changes and Additions:
//    Change pin #s to match tutorial adapter to avoid conflicts
//    Add touchscreen LCD support
//    Show WAV file playing on LCD

#include <ILI9341_t3.h>
#include <font_Arial.h>
#include <XPT2046_Touchscreen.h>
#include <Audio.h>
#include <Wire.h>
#include <SPI.h>
#include <SD.h>
#include <SerialFlash.h>

AudioPlaySdWav           playSdWav1;
AudioOutputI2S           i2s1;
AudioConnection          patchCord1(playSdWav1, 0, i2s1, 0);
AudioConnection          patchCord2(playSdWav1, 1, i2s1, 1);
AudioControlSGTL5000     sgtl5000_1;

// Use these with the Teensy Audio Shield
#define SDCARD_CS_PIN    10
#define SDCARD_MOSI_PIN  7
#define SDCARD_SCK_PIN   14

// Use these with the Teensy 4.1 SD card
//#define SDCARD_CS_PIN    BUILTIN_SDCARD
//#define SDCARD_MOSI_PIN  11  // not actually used
//#define SDCARD_SCK_PIN   13  // not actually used

// LCD control pins defined by baseboard
#define TFT_CS 40
#define TFT_DC  9

// Use main SPI bus MOSI=11, MISO=12, SCK=13 with different control pins
ILI9341_t3 tft = ILI9341_t3(TFT_CS, TFT_DC);

// Touch screen control pins defined by baseboard
// TIRQ interrupt if used is on pin 2
#define TS_CS  41
//#define TIRQ_PIN  2
XPT2046_Touchscreen ts(TS_CS);  // Param 2 = NULL - No interrupts
//===============================================================================
//  Initialization
//===============================================================================
void setup() {
  Serial.begin(9600);

   // Setup LCD screen
  tft.begin();
  tft.setRotation(3);
  ts.begin();
  ts.setRotation(1);
  tft.fillScreen(ILI9341_BLUE);

  AudioMemory(8);
  sgtl5000_1.enable();
  sgtl5000_1.volume(0.5);
  SPI.setMOSI(SDCARD_MOSI_PIN);
  SPI.setSCK(SDCARD_SCK_PIN);
  if (!(SD.begin(SDCARD_CS_PIN))) {
    while (1) {
      Serial.println("Unable to access the SD card");
      delay(500);
    }
  }
  delay(1000);
}
//===============================================================================
//  Main
//===============================================================================
void loop() {
  if (playSdWav1.isPlaying() == false) {
    Serial.println("Start playing");
    playSdWav1.play("SDTEST2.WAV");
    delay(10); // wait for library to parse WAV info
    tft.setCursor(10, 120);
    tft.setFont(Arial_10);
    tft.println("Start playing:  SDTEST2.WAV");
  }
  // do nothing while playing...
}
Once the program is downloaded, the music will start to play.
Using the Teensy 4.1 SD Card Slot
Since the Teensy 4.1 also has an SD card slot, it can be used instead of the Audio Adapter SD card slot. To do that, just uncomment the Teensy 4.1 SD card defines and comment out the Teensy Audio Shield defines as shown below. Then move the SD card to the Teensy 4.1 and download the modified software to verify it works as expected.
If you try this change, be sure to move the SD card back to the Audio Adapter or you will be wondering why it can’t find the card in the next tutorial.
// Use these with the Teensy Audio Shield
//#define SDCARD_CS_PIN    10
//#define SDCARD_MOSI_PIN  7
//#define SDCARD_SCK_PIN   14

// Use these with the Teensy 4.1 SD card
#define SDCARD_CS_PIN    BUILTIN_SDCARD
#define SDCARD_MOSI_PIN  11  // not actually used
#define SDCARD_SCK_PIN   13  // not actually used
Something to keep in the back of your mind is that the Teensy 4.1 SD card slot uses a faster SPI implementation than the one on the Audio Adapter. If you are working with SD card data where you want to maximize the data speeds, use the Teensy 4.1 card slot for best performance.
Next up, we will try to pat our head and rub our belly at the same time.