LED RGB 9W 6-Pin
$1.95
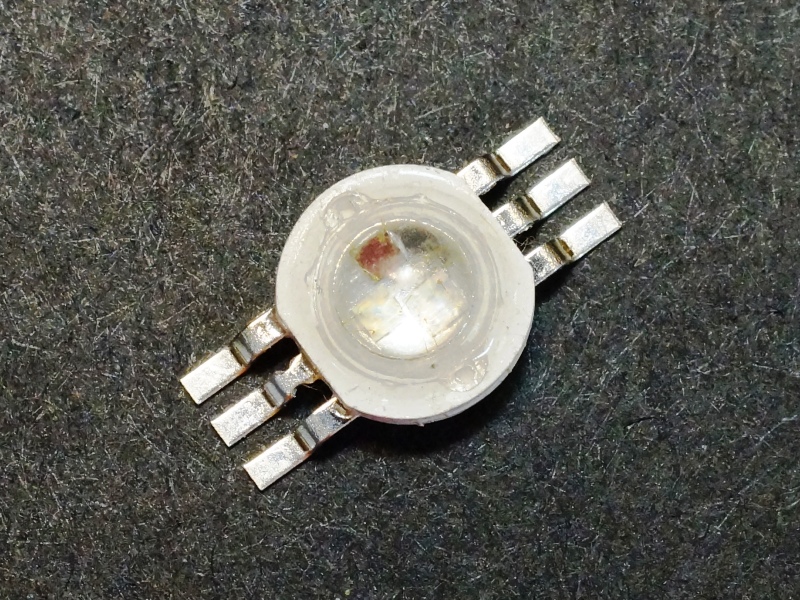
These 9W LEDs are composed for separate 3W Red, Green and Blue LEDs in the same package with individual leads for each LED accessible for maximum flexibility.
Out of stock
Description
These 9W LEDs are composed for separate 3W Red, Green and Blue LEDs in the same package with individual leads for each LED accessible for maximum flexibility.
PACKAGE INCLUDES:
- LED RGB 9W 6-Pin
KEY FEATURES OF LED RGB 9W 6-Pin:
- 3W RGB (Red/Green/Blue) LEDs contained in same package
- All 6 pins accessible
- 700mA max drive current per LED
- Bridgelux or Epistar LED chips
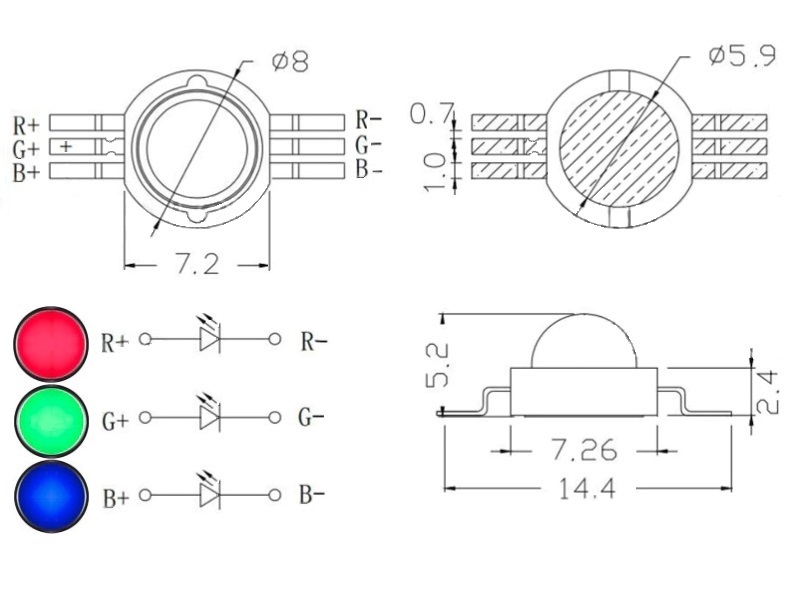
These LEDs bring out all six leads from the three LEDs so that they can be operated independently or can be operated as common cathode or common anode. Most commonly the same color LED in each device is daisy-chained together across multiple devices to form larger lighting arrays.
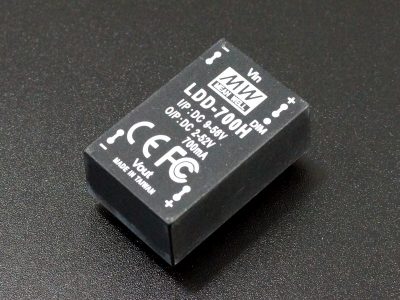
These LEDs are primarily designed to be used with a constant current LED driver like the Meanwell LDD-700 but can be driven off other circuits that have some form of current limiting to avoid damage to the LEDs or the driving source.
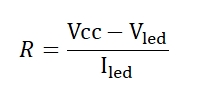
For experimentation, the device can be driven at lower brightness directly off the pins of an MCU with a suitable current limiting series resistor for each LED.
| Color | Max Power | Wavelength | Max Forward Current | Forward Voltage | Luminous Flux | LED Chip Size |
| Red | 3W | 620-625nm | 600-700mA | 2.2 – 2.6V | 80-100lm | 42mil |
| Green | 3W | 520-525nm | 600-700mA | 3.2 – 3.6V | 110-140lm | 45mil |
| Blue | 3W | 460-465nm | 600-700mA | 3.2 – 3.6V | 30-50lm | 45mil |
The LEDs can get quite hot when driven at full power. For high power applications, the LEDs should be placed on a suitable heat sink with thermal paste to avoid possible overheating.
Most 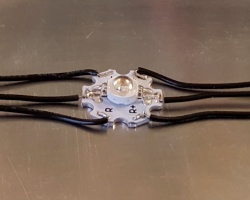
OUR EVALUATION RESULTS:
LEDs tend to be fun to play with in general and RGB LEDs are the funnest of all. With regular LEDs, you can turn them on and off, blink them or pulse them rapidly to change the perceived brightness. With RGB LEDs, you can also add playing with color blending which allows you to create pretty much any colors of the rainbow.
The minimal way to drive the LED is by using fixed levels to drive the Red/Green/Blue LEDs either individually or several together. Using it this way, you can get 7 possible colors consisting of Red, Green, Blue, Yellow (red and green both on), Purple (red and blue both on), Cyan (blue and green both on) or White (all 3 on). This is useful for color changing displays or some types of lighting.
More commonly, RGB LEDs are driven using PWM which allows the brightness of each of the Red/Green/Blue LEDs to be adjusted and therefore it is possible to color mix to get virtually any color you may want from the LED.
The example program below uses PWM directly from an MCU to show off some of the capability of the RGB LED. First it ramps the brightness of each of the Red, Green and Blue LEDs. Then it arbitrarily mixes the colors of the three LEDs together.
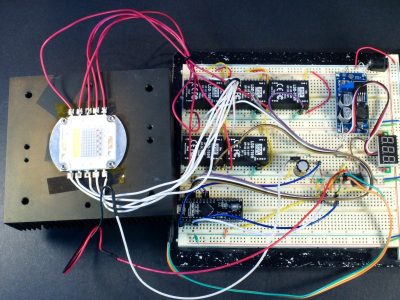
The LED is wired to pins 2, 3 and 4, but any 3 PWM capable pins can be used. Refer to the picture for the pin-out of the LED. In this case, we are using the LED in common anode mode by attaching the 3 ‘+’ pins to 5V and driving the ‘-‘ pins with the MCU. Be sure to use a suitable series current limiting resistor of 150 ohms or larger between the MCU pins and the LED to avoid damage to the MCU.
Because we are driving the LED at fairly low current, a heatsink is not required.
LED RGB CA Test Program
/*
RGB LED test

Basic code to cycle the colors of the RGB LED.
*/

int redpin = 4; // select a PWM pin for the red LED
int bluepin = 3; // select a PWM pin for the blue LED
int greenpin = 2; // select a PWM pin for the green LED
int val=0;
//===============================================================================
//  Initialization
//===============================================================================
void setup()
{
  pinMode (redpin, OUTPUT);
  pinMode (bluepin, OUTPUT);
  pinMode (greenpin, OUTPUT);
  Serial.begin (9600);      // Set output window comm rate
}
//===============================================================================
//  Main
//===============================================================================
void loop()
{
  // Cycle each of the Red / Green / Blue LEDs through their brightness range
  Serial.println ("Testing Red LED");
  for (val = 255; val < 0; val--)
  {
    analogWrite (redpin, val);
    delay(25);
  }
  analogWrite (redpin, 0);

  Serial.println ("Testing Green LED");
   for (val = 255; val < 0; val--)
  {
    analogWrite (greenpin, val);
    delay(25);
  }
  analogWrite (greenpin, 0);

  Serial.println ("Testing Blue LED");
  for (val = 255; val < 0; val--)
  {
    analogWrite (bluepin, val);
    delay(25);
  }
  analogWrite (bluepin, 0);

  // Do some color mixing by ramping all 3 of the LEDs in different directions at the same time
  Serial.println ("Cycling all 3 LEDs");
  for (val=255; val>0; val--)
  {
    analogWrite (redpin, val);
    analogWrite (bluepin, 255-val);
    analogWrite (greenpin, 128-(val-128));
    delay (25);
  }
  for (val = 0; val <255; val++)
  {
    analogWrite (redpin, val);
    analogWrite (bluepin, 255-val);
    analogWrite (greenpin, 128-(val-128));
    delay (25);
  }
  // Turn LEDs off and repeat the process
  analogWrite (redpin, 255);
  analogWrite (bluepin, 255);
  analogWrite (greenpin, 255);
}
Notes:
- None
Technical Specifications
| Type | RGB | |
| Color | Red / Green / Blue | |
| Lens | Shape | Circular |
| Dimensions (lens only) | 5.9 x 5.9 x 2.8mm | |
| Appearance | Clear | |
| Power | 9W Total 3W – Red 3W – Green 3W – Blue |
|
| Viewing Angle | To Half Brightness | ± 70 Degrees |
| Maximum Ratings | ||
| IF | Maximum Forward Current | 700mA |
| VF | Maximum Forward Voltage | 2.2 – 2.6V Red 3.2 – 3.6V Green 3.2 – 3.6 Blue |
| Package Type | Plastic body, 6-lead, SMD | |
| Package Dimensions | Diagonal x lead-to-lead x height | 8mm x 14.4mm x 5.2mm |
| Mfr | LED wafers | Epistar or Bridgelux |

