Working With USB Host
USB Quick Overview
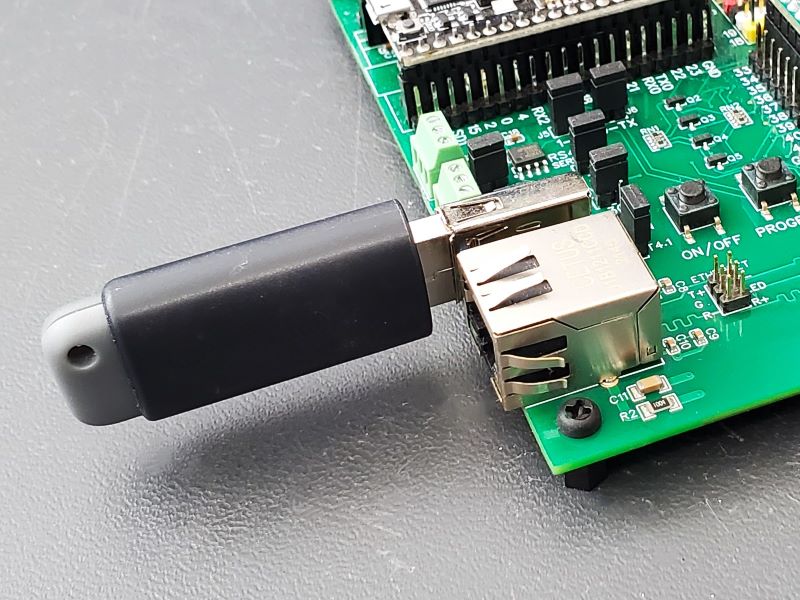
Since the Teensy 4.1 can act as a USB Host, it is helpful to review the basics of how the USB serial interface works.
USB is an intelligent serial interface that connects a device to a computer. This connection allows the computer to send or receive data from the device.
Some of the USB devices that can be connected include mouse, keyboard, MIDI, storage devices and Bluetooth adapters.
USB has evolved over the years. USB 2.0 which operates at up to 480Mbit/sec is the most universally supported standard while the newer USB 3.0 which operates at up to 5Gbit/sec is becoming more commonly supported. Ports which support USB 3.0 are usually identified by using the color blue in the connector and backwards compatible with USB 2.0.
USB due to its increased speed and functionality has largely replaced the older RS232 and parallel interfaces that were used to connect devices to computers. TTL Serial, RS485 and similar serial protocols are still commonly used for longer runs where distance is more important than speed and when a simpler ‘dumb’ serial interface suffices for the application.
USB Power
USB devices can either be bus powered or self-powered. Bus power means the USB Host must power the attached device through the USB cable as you would have with a mouse. Devices can draw a maximum of up to 500mA through the USB cable. If the device draws more than that, such as you may have with a large USB backup drive, they must be self-powered.
USB System
A USB system consists of a single host, typically a computer and one or more peripheral devices connected to the host. The host contains a host controller and a root hub.
The host controller allows connection of up to 127 devices. The host controller consists of a hardware chipset with a software driver layer that is responsible for the following tasks:
- Detect attachment and removal of USB devices
- Manage data flow between host and devices
- Provide and manage power to attached devices
- Monitor activity on the bus
The root hub is built into the chipset and provides the first interface layer between the host controller and the rest of the USB system. A PC will typically have multiple USB ports and these are each part of the root hub.
The Teensy 4.1 has this functionality built into the NXP microprocessor with a single USB host port brought out on the Teensy 4.1 module.
Each connected USB device has an address and responds to host commands addressed to it. The devices each contain one upstream port to communicate with the host. USB devices inherently have some functionality which is why they are attached in the first place.
By contrast, a hub is a specialized pass-thru device that is transparent to the host. They simply expand the number of attachment points for devices, buffer the data and usually provide the power required to power the additional attached devices rather than drawing that power from the host.
Working with the Teensy 4.1 USB Host
The Teensy 4.1 like most microcontroller development boards has a main USB port that communicates with a PC for downloading programs and reporting infomration back to the PC for display in a Serial Monitor Window. This USB port operates at 480Mbit/sec and uses the USB Micro-B style connector.
The Teensy 4.1 also has a second USB port that operates in host mode. This allows you to connect USB devices to it much like you would attach them to a regular computer. This port can support 1.5Mbit/sec, 12Mbit/sec or 480Mbit/sec speeds depending on the device that is connected.
Some of the USB devices that can be attached include mouse, keyboard, MIDI, storage devices and Bluetooth adapters.
Teeny 4.1 USB Host Physical Implementation
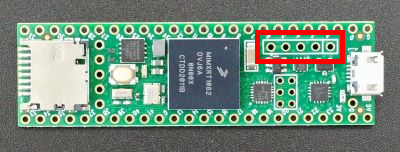
On the Teensy 4.1, this USB Host port comes out to a 5-pin unpopulated header location shown below.
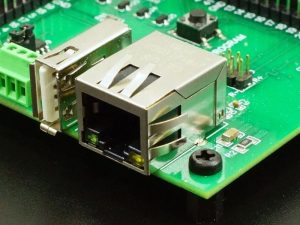
On the Prototyping System for Teensy 4.1, a male header is added to the bottom of the Teensy 4.1 that mates with a female header on the baseboard. This is then connected to a side mounted USB 2.0 connector like you would find on a typical computer.
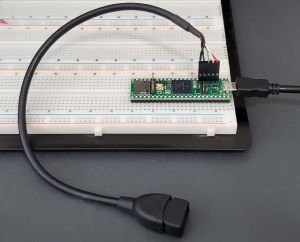
If working with a standard Teensy 4.1, a 5-pin male header can be soldered to the top the Teensy and a 5-pin to USB Host adapter cable can be used for making the electrical connection to the peripheral.
USB Host Power
A USB Host needs to optionally provide power to the USB device that is connected. A jumper behind the USB connector labeled USB 5V allows you to select whether you want to use the USB 5V controlled by the Teensy 4.1 (T4.1) or use the main 5V power from the baseboard (VIN).
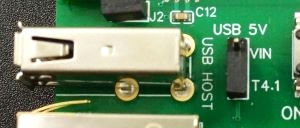
T4.1 Position – With the jumper set in the default T4.1 position, the 5V going to the USB Host connector is controlled by the Teensy 4.1. The Teensy can logically turn this power on or off using a TPD3S014 current limit switch. This switch can handle up to 500mA. If you measure the voltage when not using USB Host, it will be 0V because the Teensy 4.1 normally disables this switch when not in use.
The USB Host port power is turned on when the USB Host is initialized in the program by calling USBHost.begin() function.
The jumper is normally left in the T4.1 position unless working with something that requires more current than the Teensy 4.1 can handle.
VIN Position – With the jumper in the VIN position, the 5V going to the USB Host connector is connected directly to the 5V/VIN power on the baseboard, so the port will always have power.
The main reason for using this jumper position is when powering a USB device that requires more current than the Teensy 4.1 can handle AND the baseboard is being powered from the DC power connector. You should not use this jumper position if only powering the baseboard from the Micro-B USB port on the Teensy 4.1 or you could overload that USB connection since you are bypassing the Teensy 4.1 built-in current limit switch.
Powered Hub
If powering multiple power hungrey devices, another option is to connect the USB Host port to a powered hub and connect the peripheral devices to that hub. In that case, the hub provides the power to the peripherals and takes the load off the USB Host port.
Teensy 4.1 USB Host Library Support
Programming the USB Host or USB in general is inherently complicated and requires software libraries to do the heavy lifting, at least for for us.
For Teensy 4.1, the USBHost_t36 is the library to use. As the name implies, it was originally created for the Teensy 3.6, but now also supports the Teensy 4.1.
The good news is that there are a number of example programs available to demonstrate usage, but unfortunately the user documentation is lacking.
The USBHost_t36 library is included as part of the Teensyduino and can also be found on GitHub: https://github.com/PaulStoffregen/USBHost_t36
Testing the USB Host Port
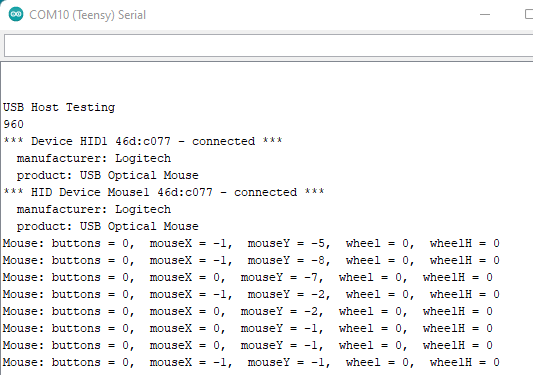
The easiest way to verify the basic setup is functional before diving into software is to open the example program Examples/USBHost_36t/Mouse.
Plug a wired mouse into the USB Host port, download the software and open the Serial Monitor window. Wiggling the mouse around and clicking buttons should be reported in the Serial Monitor window like shown below.
USB Drive Example Program
Next we’ll take a closer look at using the USB Host port to read directories and files on a USB Flash drive since most people have one or more of those laying around. We are using a modified version of the ListFiles example that comes with the USBHost_t36 library which is just pruned down a little and with some additional comments added for clarification.
Insert a USB drive (thumbdrive) into the USB Host port, then copy and paste the following program into the IDE and download it to the Teensy 4.1. Open the Serial Monitor window and you should see the list of files and directors found on the USB drive.
Teensy 4.1 ListFiles Example Program
/*
 USB Host Directory and list example
 Based on USBHost_t36/Storage/ListFiles example

 Insert USB thumb drive with some files/directories on it into USB Host port
 */
#include <USBHost_t36.h>

// Setup USBHost_t36 and give it a name (myusb)
USBHost myusb;

// Setup MSC (Mass Storage Controller) for the USB Drives we will be using.
USBDrive myDrive(myusb);

// Define the number of disk partitions to use.  We are using one (firstPartion)
USBFilesystem firstPartition(myusb);
//===============================================================================
//  Initialization
//===============================================================================
void setup() {
  Serial.begin(9600);
  while (!Serial) {
    ;  // wait for serial port to connect.
  }

  // Start USBHost_t36 and USB devices.
  myusb.begin();

  // Update USB state by calling Task and wait for partion to initialize
  Serial.print("\nInitializing partition... ");
  while (!firstPartition) {
    myusb.Task();
  }
  Serial.println("initialization done.");

  // Open root directory and print the contents
  File root = firstPartition.open("/");
  printDirectory(root, 0);
  Serial.println("done!");
}
//===============================================================================
//  Main
//===============================================================================
void loop() {
  // nothing happens after setup finishes.
}
//===============================================================================
//  printDirectory - Prints all files and directories on the USB drive
//  using recursion to explore each directory.
//===============================================================================
void printDirectory(File dir, int numSpaces) {
  while (true) {  // More files to print
    File entry = dir.openNextFile();
    if (!entry) {  //No more files or directories - exit loop
      break;
    }
    printSpaces(numSpaces);
    Serial.print(entry.name());
    // If directory, recursively calls itself to get files in that directory
    if (entry.isDirectory()) {
      Serial.println("/");
      printDirectory(entry, numSpaces + 2);
    } else {
      // its a file so print size. Directories do not have a size
      printSpaces(48 - numSpaces - strlen(entry.name()));
      Serial.print("  ");
      Serial.println(entry.size(), DEC);
    }
    entry.close();
  }
}
//===============================================================================
//  printSpaces - Used to format the spacing of the output
//===============================================================================
void printSpaces(int num) {
  for (int i = 0; i < num; i++) {
    Serial.print(" ");
  }
}
myusb.Task(); allows all active drivers to update their state and / or call any attached user callback functions. In a more full featured program, this is typically called repeatedly from within loop() to keep everything updated.
The USBFilesystem objects allow you to do all of the normal file operations like opening and closing files and reading and writing data to them such as:
// Create a file object
File myFile;
// Open a file and write some text to it
myFile = firstPartition.open(“test.txt”, FILE_WRITE);
myFile.print(“Just some test data written to the file (by SdFat functions)”);
myFile.write((uint8_t)’\0′); // add a null byte to mark end of string
myFile.close();
// Reopen the file and read the text back out and print to Serial Monitor window
myFile = firstPartition.open(“test.txt”);
if (myFile) {
Serial.println(“test.txt:”);
// read from the file until there’s nothing else in it:
while (myFile.available()) {
Serial.write(myFile.read());
}
myFile.close();
Going Further….
You can try adding basic file open/write/read commands like shown above to the current program.
Try downloading and running some of the other example programs that come with the USBHost_t36 library.
