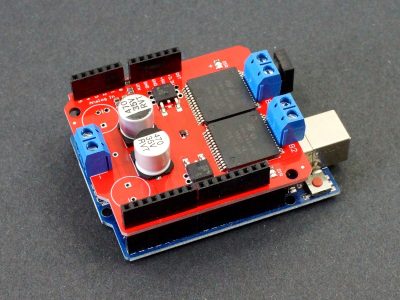
VNH2SP30 Single Monster Motor Driver Module
$9.25
The VNH2SP30 Single Monster Motor Driver Module can drive motors up to 12A sustained with adequate heat sinking and 6A without a heat sink..
Out of stock
Description
The VNH2SP30 Single Monster Motor Driver Module can drive motors up to 12A sustained with adequate heat sinking and 6A without a heat sink.
PACKAGE INCLUDES:
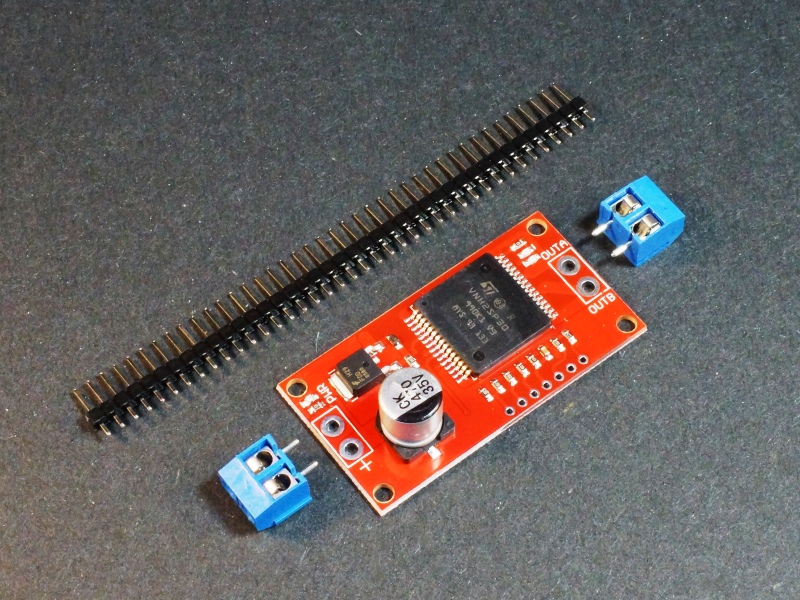
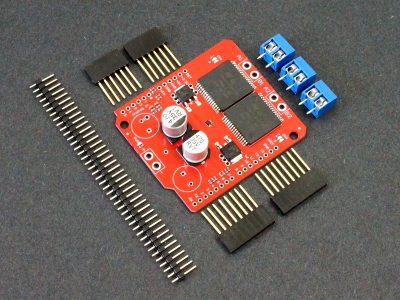
- VNH2SP30 Single Monster Motor Module
- 1 x 40 snappable male header strip
- 2 x 2-pos 5.08mm screw terminal strip
KEY FEATURES OF VNH2SP30 SINGLE MONSTER MOTOR DRIVER MODULE:
- Drive 1 DC motor at 5.5 – 16V
- 30A peak current, 12A sustained with adequate heat sink and 6A with no heat sink.
- Full H-Bridge with speed control via PWM and direction control
- Reverse power protection
- Drive current monitoring capability
- Diagnostic output to detect thermal shutdown and similar faults.
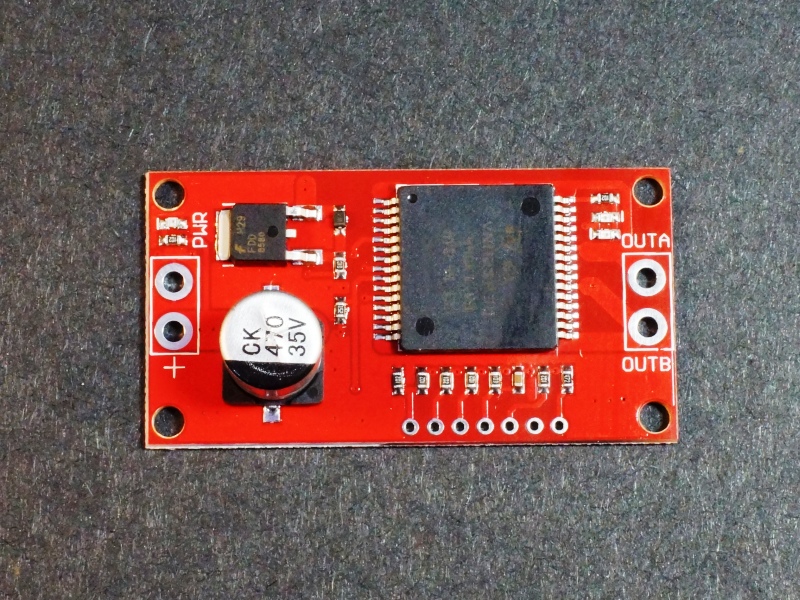
This module is a 1-channel DC motor driver based on the VNH2SP30-E driver chip. These devices were originally designed to drive motors in automotive power seats, so they are designed to handle a fair amount of power and can go up to 30A peak and around 12-14A sustained with adequate heat sinking. Without heat sinking, current should be limited to 6A.
Besides high current handling capability, the device provides the ability to measure motor current and provide fault status. These are a great choice when you are either using larger motors or just want to take your motor control to the next level over what a more typical driver module can provide.
When used with DC motors, the H-Bridge drive arrangement allows the direction of the rotation of the motors to be changed. In addition PWM can be used to control the speed of the motors. This gives full control over the DC motors.
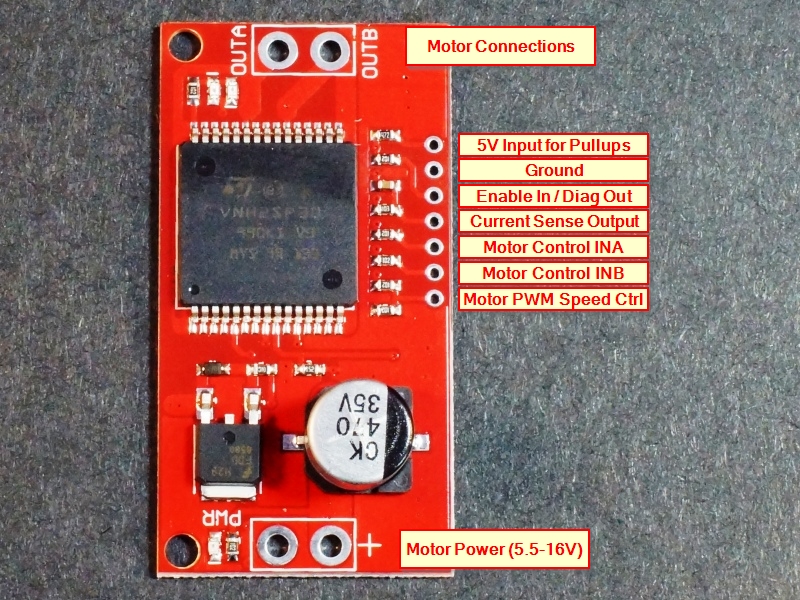
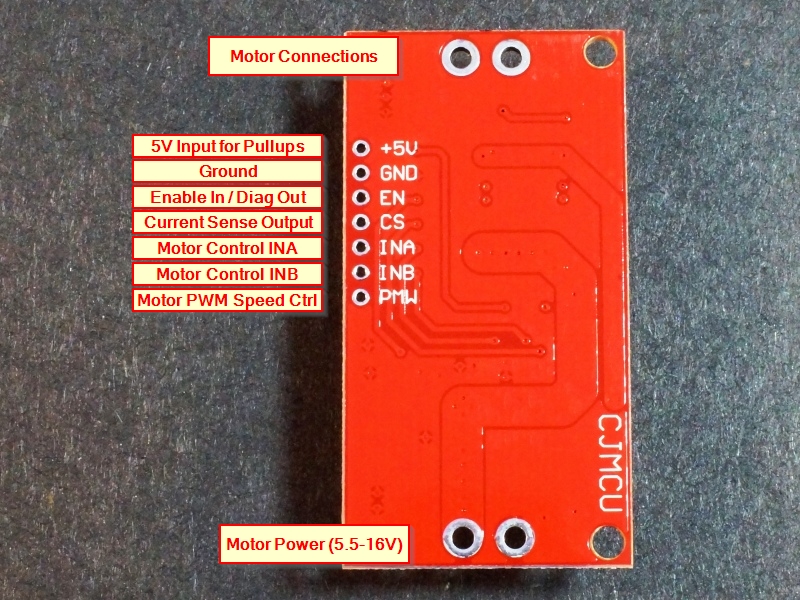
Motor Power Connections
Motor voltage must be between 5.5 – 16V. The module has reverse power protection via the use of N-Channel MOSFET on the low side of the driver. 5V which comes from the microcontroller is only used for logic pull-ups on the board for the ENABLE pins.
1 x 2 Terminal (Motor Power)
- ‘+’ = Motor Vcc which must be between 5.5 and 16V.
- ‘-‘ = Motor Ground.
Motor Connections
The motor connections are via two screw terminals. Multiple motors can be driven off the connection as long as the total current stays within bounds and you want the motors to be doing the same thing i.e. same direction and speed.
The wiring of which lead of the motor connects to which terminal is somewhat arbitrary and relative to what you consider forward vs reverse motor operation. If the motor goes in the opposite direction that you expect, simply reverse the wiring.
1 x 2 Terminal (Motor)
- OUTA – Motor ‘-‘ positive lead
- OUTB – Motor ‘+’ negative lead
Motor Control Pins
The INA and INB pins control the state of the H-Bridge in the device. The basic modes are to rotate CW, rotate CCW or brake. The operation is per the table below
| INA | INB | |
| Forward Direction (CW) | HIGH | LOW |
| Reverse Direction (CCW) | LOW | HIGH |
| Stopped (Brake to GND) | LOW | LOW |
| Stopped (Brake to VCC) | HIGH | HIGH |
CS Current Sense Pins
The analog voltage output provides a representation of the amount of current being drawn by the motor. Accuracy of the current sensing reading is approximately 10%. They are less accurate at lower currents such as around 150mA and more accurate at higher currents. In addition, the reading may vary a bit depending on the direction that the motor is turning as the sensing circuits are different depending on the direction of rotation of the motor.
If used, this output should be connected to an analog input pin.
There is a small 33nF cap on the module to help filter the PWM pulse noise out of the current sense output. This is inadequate in most cases and the reading may be erratic. A 1 to 10uF or so capacitor between these pins and ground will usually provide adequate filtering to get reliable readings.
EN/DIAG Pins
These pins serve a dual purpose and are bi-directional. First they are the Enable pins for the device and are active HIGH. The module has pull-ups on these pins, so if left unconnected or set as inputs, the drivers will always be enabled. If the pins are being used to enable/disable the drivers, they need to be driven HIGH to enable the devices.
The second purpose they serve is to indicate a fault such as a thermal shutdown. If that should occur, the pins are driven LOW by the module. See the truth table in the datasheet linked below on page 15 for operation of the DIAG function.
OUR EVALUATION RESULTS:
These modules work very well and are straightforward to use for basic motor control.
Our test results for thermal performance vs motor current indicates that 6A is about the most that can be pulled before some heat sinking is applied. Tmax on the case is 150C. Below are some thermal results of the case temperature under different loads.
2A = 35C
3A = 50C
4A = 65C
5A = 92C
6A = 115C
If you are familiar with the common L298N motor drivers, the basic control logic is very similar and is easy enough that a library is not needed to implement the software to control them though there are some libraries available up on GitHub if you want to go that route.
It does get a little more tricky when working with the CS (current sensing) and DIAG (Diagnostics) functions. A review of the datasheet will help in understanding these functions better. These can be nice to have features for incorporating feedback of the system status into your code. For instance, you can tell if a motor has been stalled or if the device has gone into thermal shutdown.
The program below illustrates the basic use of this module. It allows the user to enter commands via the Serial Monitor window to control the functions of the motors.
- S = Stop motors
- F = Forward direction
- R = Reverse direction
- C = Return the current readings from the motors
- Pxxx = Sets the PWM speed from 0 (P0) to 255 (P255)
- P? = Returns the current PWM setting
Note that you can use upper or lower case letters when entering commands.
The pins used are defined in the program, but can be changed as needed for the uC you are using:
Pin 7 = Motor A1
Pin 8 = Motor B1
Pin 5 = Motor PWM. Needs to be a PWM capable pin
Pin A0 = Diagnostic Output. Can be any analog pin
Pin A2 = Current Sense. Can be any analog pin
VNH2SP30 Single Monster Motor Driver Module Example Program
/*
Exercise Monster Motor Mini Module
Uses Serial Monitor window to issue commands for controlling the DC motor
connected to the module
S = Stop
F = Forward
R = Reverse
C = Returns the current reading of the motors
Pxxx (P0 - P255) sets the PWM speed value
P? = Returns the current PWM value
*/
const int BRAKE = 0;
const int CW = 1;
const int CCW = 2;
const int CS_THRESHOLD = 15;

const int MOTOR_A1_PIN = 7;   //Motor control input pins
const int MOTOR_B1_PIN = 8;

const int PWM_MOTOR = 5;      // Motor PWM input pin
const int CURRENT_SENSE = A2; // Current sense pin
const int EN_PIN = A0;        // Enable/Diag pin

int motor_Speed = 150;    //Default motor speed
int motor_State = BRAKE;  // Current motor state
int mot_current = 0;      // Motor current

char readString[4];   // String array to hold PWM value typed in on keyboard
//===============================================================================
//  Initialization
//===============================================================================
void setup() {
  pinMode(MOTOR_A1_PIN, OUTPUT);
  pinMode(MOTOR_B1_PIN, OUTPUT);
  pinMode(PWM_MOTOR, OUTPUT);
      // Uncomment the next 2 lines to use the Enable pins to enable/disable the device.
      // To monitor for fault conditions instead, they would be defined as inputs
 // pinMode(EN_PIN, OUTPUT);
 // digitalWrite(EN_PIN, HIGH);

  Serial.begin(9600);           // Initialize serial monitor
  Serial.println("Enter command:");    // Printout commands
  Serial.println("S = STOP");
  Serial.println("F = FORWARD");
  Serial.println("R = REVERSE");
  Serial.println("C = READ MOTOR CURRENT");
  Serial.println("Pxxx = PWM SPEED (P000 - P254)");
  Serial.println("P? = RETURNS CURRENT PWM SPEED");
}
//===============================================================================
//  Main
//===============================================================================
void loop() {
// Just loop while monitoring the serial port and then jump to DoSerial to
// handle incoming characters and act on them
if (Serial.available()) DoSerial();
}
//===============================================================================
//  Subroutine to handle characters typed via Serial Monitor Window
//===============================================================================
void DoSerial()
{
  int index = 0;
  int pwm_Value = 0;
  int mot1_ADC = 0;
  float mot1_voltage = 0.0;

  char ch = Serial.read();  // Read the character we know we have
  Serial.println(ch);       // Echo character typed to show we got it

  // Use Switch/Case statement to handle the different commands
  switch (ch) {
  case 'f':   // Motor FORWARD command
  case 'F':   // This fall-through case statement accepts upper and lower case
    motor_State = CW;
    Motor_Cmd(motor_State, motor_Speed);
    Serial.println("Motor Forward");
    break;

  case 'r':   // Motor REVERSE command
  case 'R':
    motor_State = CCW;
    Motor_Cmd(motor_State, motor_Speed);
    Serial.println("Motor Reverse");
    break;

   case 's':   // Motor STOP command
   case 'S':
    motor_State = BRAKE;
    Motor_Cmd(motor_State, 0);
    Serial.println("Motor Stop");
    break;

   case 'c':   // Motor Current command
   case 'C':
    mot1_ADC = analogRead(CURRENT_SENSE);
    mot1_voltage = mot1_ADC * (5.0 / 1024);
    Serial.print("Motor 1 Current: ");
    Serial.print (mot1_voltage * 26*100);
    Serial.println (" mA");
    break;

  case 'p':  // Motor SPEED command
  case 'P':
    // This command is a little trickier.  We are looking for a number from 0-255
    // to follow this command so we can set the PWM speed.  If we see a '?'
    // we will report our current speed setting, otherwise we start collecting chars
    // into the readString array.
    delay(2);  // Give time for more characters to arrive.
    for (int i; i<4; i++) readString[i] = ' ';  // Clear string array
    while (Serial.available())  // Read what we get and put into the string array
    {
      char c = Serial.read();
      readString[index] = c;
      index++;
      delay(2);
    }
    readString[3] = ''; // Append null to end of string array to make it a valid string
    index = 0;            // Reset our index back to the start of the string
    if (readString[index] == '?')   // ? means report our current speed setting and exit.
    {
      Serial.print("Current PWM Setting: ");
      Serial.println(motor_Speed);
      break;
    }
    pwm_Value = atoi(readString);  // Try to convert string into integer
    // We assume a 0 value is because of a non-valid input and ignore the command
    if(pwm_Value!=0) {
      if (pwm_Value > 255) pwm_Value = 255;     // Cap WPM setting at 255
      Serial.println(pwm_Value);        // Echo what we end up with to confirm we got it
      motor_Speed = pwm_Value;
      Motor_Cmd(motor_State, motor_Speed);
    }
    break;

  default:
    break;
  }
}
void Motor_Cmd(int direct, int pwm)     //Function that writes to the motors
{
  {
    if(direct == CW)    {
      digitalWrite(MOTOR_A1_PIN, LOW);
      digitalWrite(MOTOR_B1_PIN, HIGH);
    }
    else if(direct == CCW)    {
      digitalWrite(MOTOR_A1_PIN, HIGH);
      digitalWrite(MOTOR_B1_PIN, LOW);
    }
    else    {
      digitalWrite(MOTOR_A1_PIN, LOW);
      digitalWrite(MOTOR_B1_PIN, LOW);
    }
    analogWrite(PWM_MOTOR, pwm);
  }
}
BEFORE THEY ARE SHIPPED, THESE MODULES ARE:
- Inspected
- Basic operation of driver verified
- Repackaged in quality recloseable ESD bags for safe storage.
Notes:
- None
Technical Specifications
| Operating Ratings | ||
| Voltage range (Vcc) | 5.5 – 16VDC | |
| Max current per bridge (peak) | 30A | |
| Max current per bridge (sustained) | 12-14A (with heat sinking) | |
| Dimensions | ||
| Driver Board (L x W) | 55 x 29mm (2.2 x 1.1″) | |
| Datasheet | VNH2SP30-E |

