TCA9548A I2C 8-Ch Multiplexer Module
$1.79
Connect up to 8 I2C devices or 8 separate I2C buses.
23 in stock
Description
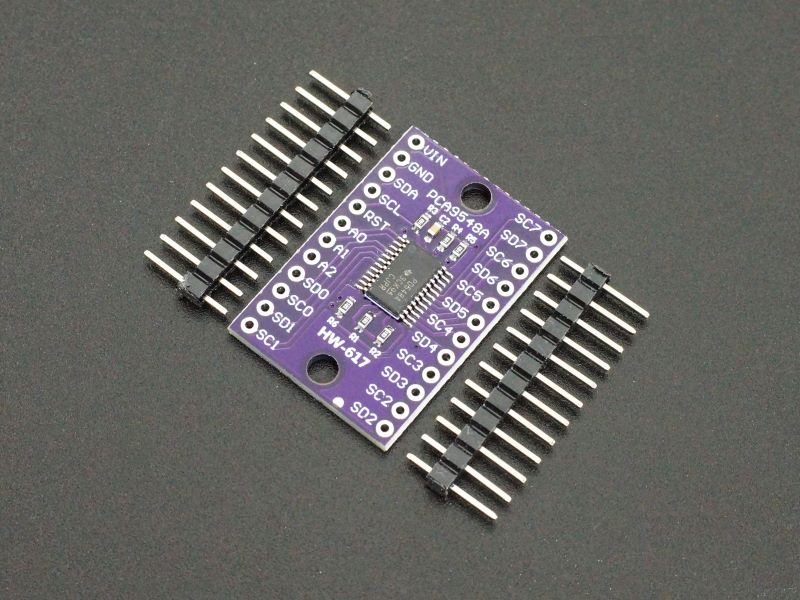
The TCA9548A / PCA9548A is an I2C multiplexer that allows up to 8 devices with the same I2C address to be hooked up to an MCU or permits up to 8 separate I2C buses to be controlled. The two modules are identical other than the TCA can operate down to 1.8V and the PCA can operate down to 2.3V.
PACKAGE INCLUDES:
- TCA9548A or PCA9548A Module
- Qty 2 – 12-pin male header strips
KEY FEATURES OF I2C 8-CHANNEL MULTIPLEXER MODULE:
- 1 to 8 bi-directional I2C switches
- Allows level translation between individual buses
- I2C control interface
- 3.3 & 5V operation
One of the great things about I2C is that multiple devices can be hooked up to the same I2C bus if their addresses are unique. In some cases, a part may have a fixed address and therefore it is impossible to use more than one of the devices on the same bus or in another case, two different devices may happen to have the same fixed I2C address which also creates a bus conflict.
You may also want to separate a large number of devices on a single I2C bus into several smaller buses due to loading concerns or for bus isolation.
The TCA9548A addresses those issues by allowing a single master I2C bus to address up to 8 different slave I2C buses individually or in any combination. The multiplexer is given a command as to which bus(es) to use and then any future I2C communications will continue to use that bus configuration until commanded to use a different one.
The module uses the 24-pin TCA9548A or PCA9548A 8-channel I2C multiplexer chip. It supports I2C bus speeds up to 400kHz and allows level translation between 2.5V, 3.3V and 5V buses. The only difference between the TCA and PCA version is that the TCA can support down to 1.8V operation while the PCA can operate down to 2.3V. Otherwise they are identical and we don’t differentiate between them.
Master I2C Interface
The modules master default I2C address is 0x70. Address lines A0-A2 which are normally LOW allow the address to be set to the range of 0x70 – 0x77 by pulling the address pins HIGH. Pulling all 3 pins HIGH results in the address 0x77.
This allows up to 8 of these modules to be controlled by one I2C bus which results in the ability to control up to 64 slave buses.
The master I2C lines have 10K pull-up resistors included on the module.
Slave I2C Interfaces
The module has 8 slave I2C interfaces labeled SD0/SC0 thru SD7/SC7.
The slave I2C lines do not have pull-up resistors on the module. In most cases, the I2C devices being controlled will have pull-up resistors installed, but if not you should add a 4.7K to 10K pull-up resistor on the SDx and SCx lines that are being used.
Module Connections
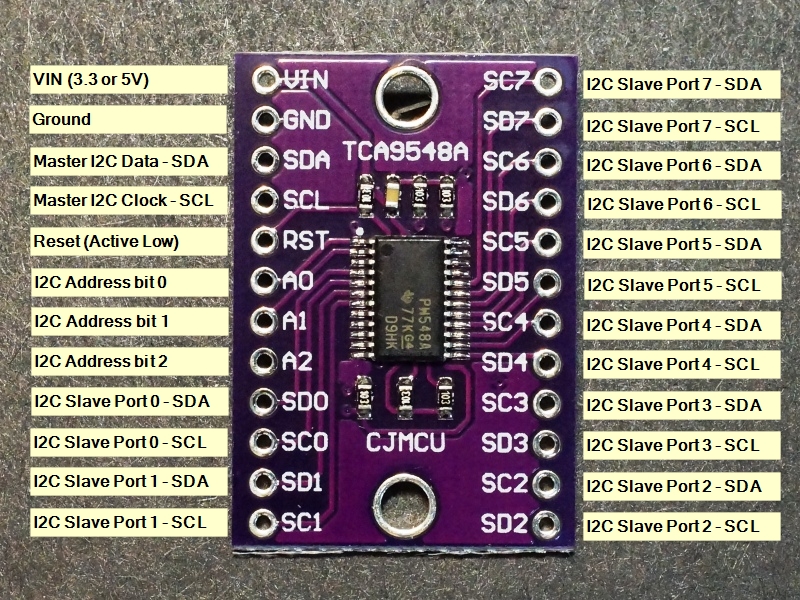
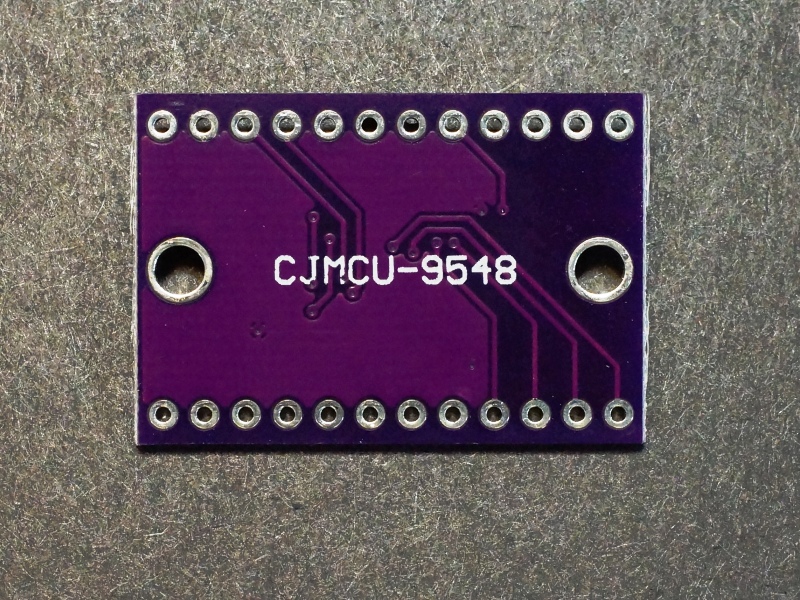
The board has two 12-pin male headers which give access to all the chip pins. All inputs are 5V tolerant. The header rows are on a fairly wide 0.7″ spacing.
1 x 12 Header (left)
- VIN = Supports 1.65V to 5.5V power (3.3 or 5V typical)
- GND = Ground. Should be common with MCU
- SDA = Master I2C Data
- SCL = Master I2C Clock
- RST = Reset active LOW. Pulled HIGH on module with 10K resistor by default
- A0 = Master I2C Address pin 0
- A1 = Master I2C Address pin 1
- A2 = Master I2C Address pin 2
- SD0 = Slave I2C Bus 0 – SDA
- SC0 = Slave I2C Bus 0 – SCL
- SD1 = Slave I2C Bus 1 – SDA
- SC1 = Slave I2C Bus 1 – SCL
1 x 12 Header (right)
- SC7 = Slave I2C Bus 7 – SDA
- SD7 = Slave I2C Bus 7 – SCL
- SC6 = Slave I2C Bus 6 – SDA
- SD6 = Slave I2C Bus 6 – SCL
- SC5 = Slave I2C Bus 5 – SDA
- SD5 = Slave I2C Bus 5 – SCL
- SC4 = Slave I2C Bus 4 – SDA
- SD4 = Slave I2C Bus 4 – SCL
- SC3 = Slave I2C Bus 3 – SDA
- SD3 = Slave I2C Bus 3 – SCL
- SC2 = Slave I2C Bus 2 – SDA
- SD2 = Slave I2C Bus 2 – SCL
Assembling the Module
The module comes with 2 strips of male headers. These can be soldered on for use on a breadboard, or you can attach wires directly to the board depending on what your application requires.
When soldering the headers on, it is recommended to insert the headers into a solderless breadboard or perf board first to hold them in alignment while soldering.
OUR EVALUATION RESULTS:
These are useful modules that can solve an otherwise difficult issue when you have one I2C bus available and need more to avoid device conflicts or to split an I2C bus up into several for loading concerns or to provide some isolation.
To use the device is straight forward. First you select which slave port you want to communicate with by writing a single byte with the port number and then any future I2C communications will be sent to that port until a new slave port is set.
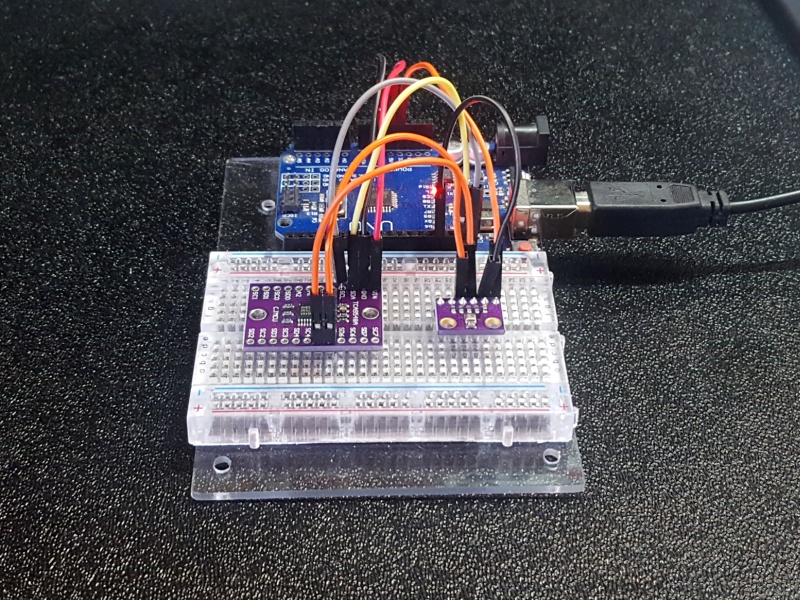
In our example here, we are using a simple program to scan all 8 slave ports and look for any I2C devices that may be attached. If any devices are found, the I2C address of that device and the slave port it is attached to is sent to the Serial Monitor window.
Connect SDA and SCL between the MCU and the TCA9548A module.
Connect VIN to 3.3V or 5V to match the MCU power and connect GND to ground.
Connect one or more modules with an I2C interface to one or more of the slave ports. It doesn’t really matter what they are as we will just be looking to see if we can find them. Be sure to apply the correct power for that device as well as ground.
TCA9548A/PCA9549A Slave Scan Program
/*
   This program exercises the TCA9548A I2C Multiplexer module by scanning
   the 8 slave channels to see if it can find any I2C devices attached

   Connect master I2C SDA and SCL pins between MCU and module
   Connect one or more I2C devices to one or more of the SDx and SCx pin pairs
   Connect VIN to 5V or 3.3V to match your MCU and connect GND to ground
   Ensure your attached slave devices have appropriate power and ground applied.
*/
#include <Wire.h>
extern "C" {
#include "utility/twi.h"  // From Wire library for bus scanning
}

int const TCA_ADDR = 0x70;  // I2C address of our TCA9548A chip
//===============================================================================
//  Initialization
//===============================================================================
void setup() {
  Serial.begin(9600);

  Wire.begin();
  byte data;
  if (! twi_writeTo(TCA_ADDR, &data, 0, 1, 1)) {
    Serial.println("Found TCA9548A Module");
  Serial.println("Begin Scan: ");
  for (byte port = 0; port < 8; port++) {   // Cycle through each slave port #
    TCA_Select(port);                       // Select that port on the TCA9548A
    Serial.print("TCA Port #"); Serial.println(port);

    for (byte I2C_addr = 0; I2C_addr <= 127; I2C_addr++) {
      if (I2C_addr == TCA_ADDR) continue;   // Ignore the TCA9548A Chip address
      // Write to each address and look for a '0' response which indicates success
      byte data;
      if (! twi_writeTo(I2C_addr, &data, 0, 1, 1)) {
        Serial.print("Found I2C 0x");  Serial.println(I2C_addr, HEX);
      }
     delay(1);  // Small delay seems to help in some cases
    }
  }
  Serial.println("\Scan done");
  }
  else {
  Serial.println("TCA9548A module not found - Scan Aborted");
  }
}
//===============================================================================
//  Main
//===============================================================================
void loop() {
  // Nothing going on here.  Everything done in setup.
}
//===============================================================================
//  TCA9548A Port Switch Routine
//===============================================================================
void TCA_Select(byte i) {
  if (i > 7) return;  // Check for valid port range of 0 thru 7
  Wire.beginTransmission(TCA_ADDR); // Address the TCA9548A chip
  Wire.write(1 << i);               // Write the byte to set the slave port
  Wire.endTransmission();
}
BEFORE THEY ARE SHIPPED, THESE MODULES ARE:
- Sample tested per incoming shipment
Notes:
- None
Technical Specifications
| Operating Rating | Vcc | 2.3 – 5.5V (3.3 or 5V typ) |
| Clock Frequency | 0 – 400kHz | |
| Dimensions | L x W (PCB) | 31 x 21mm (1.2″ x 0.83″) |
| DIP row spacing | 17.8mm (0.7″) | |
| Country of Origin | China | |
| Datasheet | Texas Instruments | TCA9548A |


