Sharp GP2Y0A02YK0F IR Distance Measuring Sensor Module
$13.75 Original price was: $13.75.$8.95Current price is: $8.95.
Uses Infrared (IR) to detect and measure the distance to the objects up to 5 feet
2 in stock
Description
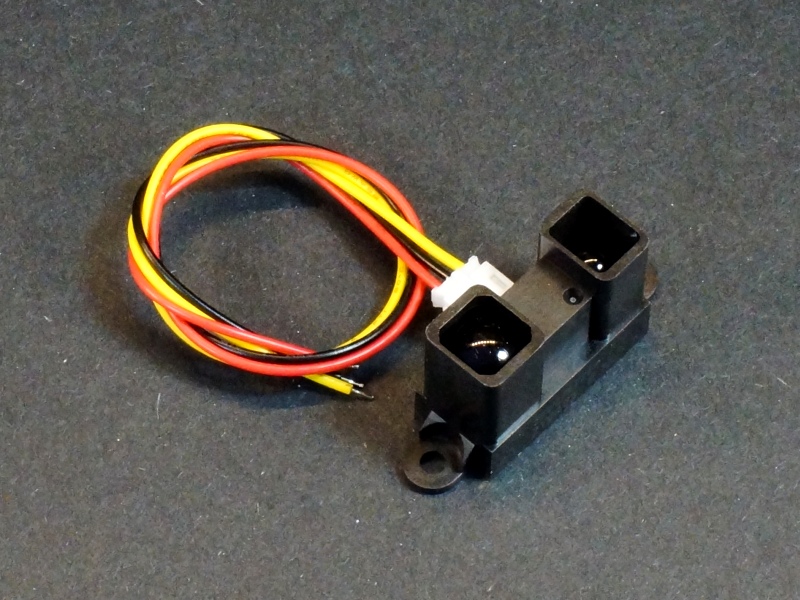
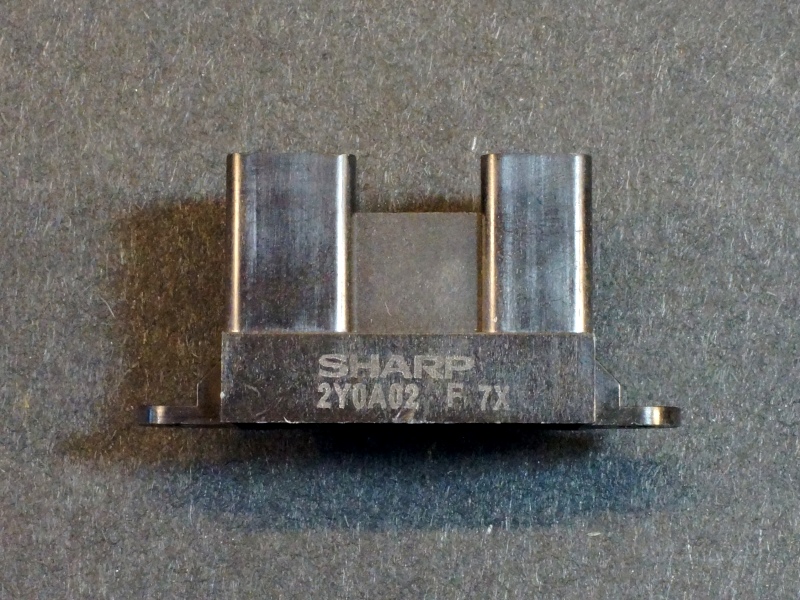
The Sharp GP2Y0A02YK0F Distance Measuring Sensor Module uses Infrared (IR) to both detect obstacles and measure the distance to the objects in front of it. The detection and measurement range is from 20cm up to 150cm (8″ to 60″). We ship these sensors with a compatible 8″ JST pigtail cable for easy hook-up.
PACKAGE INCLUDES:
- Sharp GP2Y0A02YK0F Distance Measuring Sensor module
- Female JST 3-wire 8″ pig-tail cable
KEY FEATURES OF SHARP GP2Y-A-2YK0F DISTANCE MEASURING SENSOR MODULE:
- Compact design
- Detection range of 20 cm to 150 cm (8″ to 60″)
- Analog output relative to the detection distance
- 5V Operation
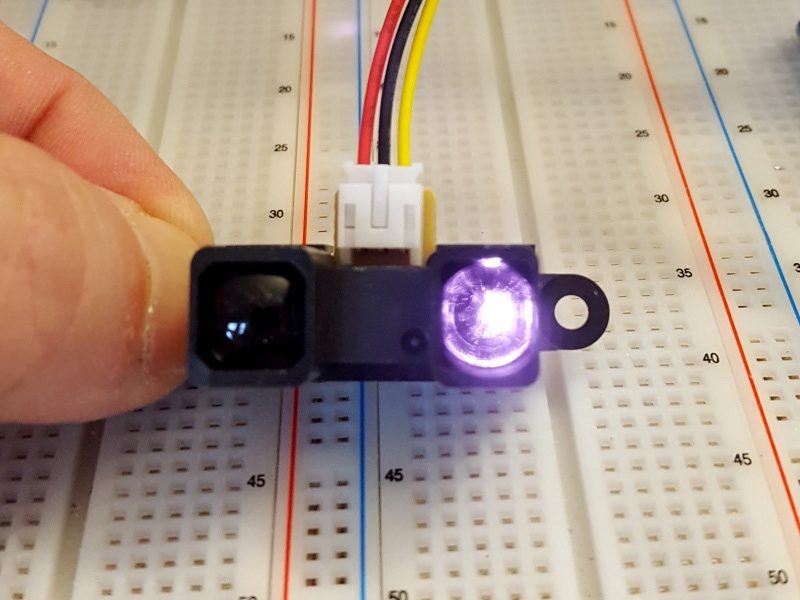
The sensors operate by transmitting 1 kHz bursts of IR which are repeated at a 24 Hz rate and detecting the reflected light using a PSD (Position Sensitive Detector) that allows it to both detect objects via reflection, as well as calculate the distance to the object. This setup allows the sensor to detect most surfaces fairly well independent of how reflective the surface is. The IR is not visible to the human eye, but can be observed by looking at the sensor with a cell phone camera which is sensitive to IR light as shown in one of the pics.
These types of sensors can be used in robotics for object detection and distance measurements such as for obstacle avoidance, but they also work well for implementing applications such as touch-less switches or proximity sensing as might be used at an ATM to detect that someone is standing in front of the machine. The detection angle is not specified, but it is fairly narrow. These types of sensors are sometimes mounted to servo motors, so that the sensor can ‘look around’ at more of its environment.
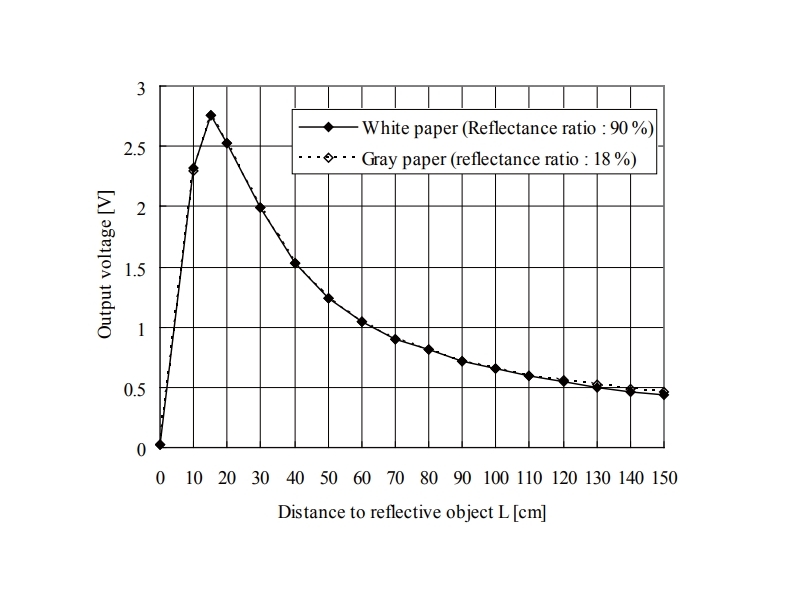
The output of the sensor is analog with the distance represented by an analog voltage that can be read by an ADC input on a uC. The output voltage ranges from about 0.4V to 2.7V and increases as the distance gets shorter. Take careful note that once a minimum distance of about 15cm is reached, the voltage will reverse direction and begin to decrease as the distance continues to get shorter, so use care not to misinterpret the results once inside the valid measurement range.
Connections
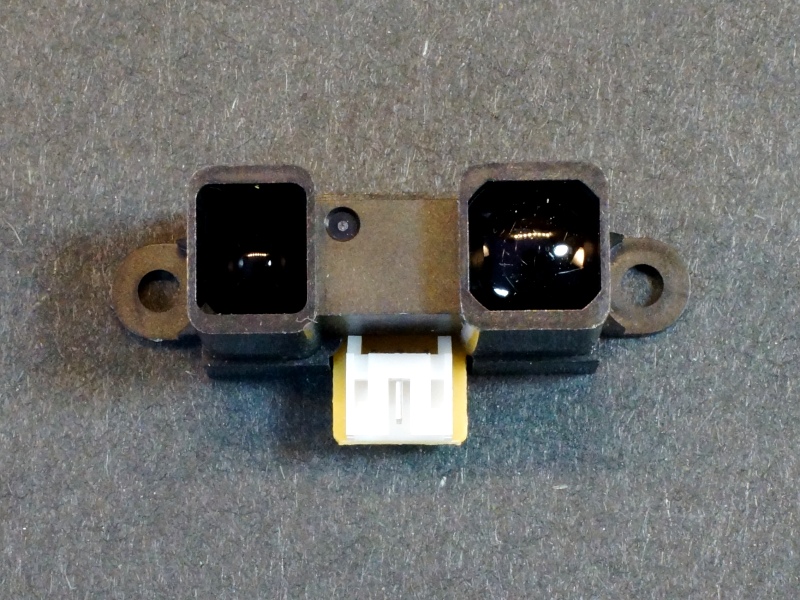
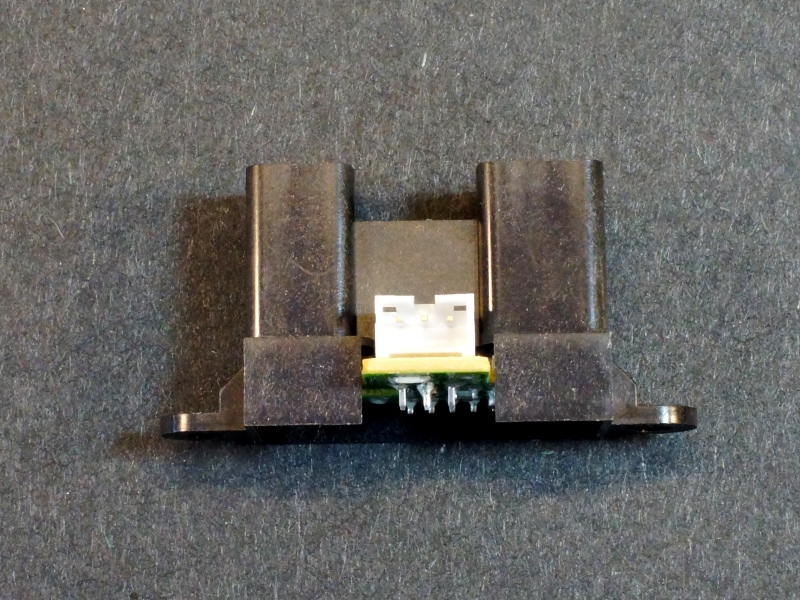
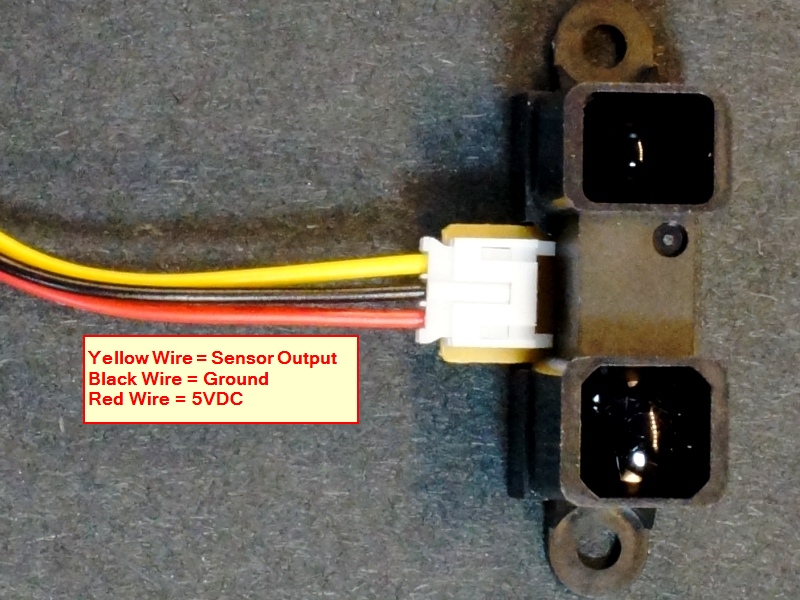
There is a 3-pin header on the assembly. The pins are not labeled, but by using the supplied cable harness wire colors, the pin-out is as shown below.
1 x 3 Header
- Red Wire – Connect to 5V.
- Black Wire – Connect to system ground. This ground needs to be in common with the microcontroller.
- Yellow Wire – Analog output. Connect to any ADC input on microcontroller.
OUR EVALUATION RESULTS:
This is a commonly used module for obstacle detection and basic range finding. These modules are much more capable than the basic IR obstacle avoidance sensors that come in sensor kits and are highly recommended if you are building a motorized robotic car and want to implement a nicely capable obstacle avoidance system or just want to measure distance for some other reason using IR. A possible alternative to consider for this application is an ultrasonic sensor which uses sound rather than light.
There is not a stated measurement accuracy for this sensor. Empirical testing under typical use conditions indicates it seems reasonable to expect about a +/- 10% accuracy which is adequate for most applications.
The maximum analog output of the sensor is less than 3V, so one technique to optimize distance measurement accuracy is to use an ADC reference voltage of 3V – 3.3V rather than the typical 5V. This gives a finer resolution to the sensor readings. Arduino boards have an AREF pin that can be used to input a specific voltage for the ADC to operate on. If an external voltage is used, then the command analogReference (EXTERNAL) must be given to tell the microcontroller to use that external voltage. Empirical bench testing indicated an accuracy improvement of about 0.25″ at a distance of 10″ when going from a 5V to 3V ADC reference voltage. If using a 3.3V microcontroller, the ADC will already be running at 3.3V.
These sensors operate in a burst mode that creates fairly sharp current spikes on the power lines. If the sensor is positioned remotely from the power supply, the manufacturer recommends that a 10uF or larger capacitor should be placed across the power and ground lines close to the sensor to reduce noise spikes. We have measured a definite noise improvement with an O-Scope when that is done and it is good practice, but measurement accuracy did not seem to be affected much, especially if multiple readings are averaged as is done in the example code down below.
The program below implements a basic setup where the measured range is displayed in centimeters and inches. There are constants at the beginning of the program that allow you to change the number of readings to average together as well as setting the ADC voltage if changed from 5V. If using an external ADC voltage, be sure to uncomment this line: // analogReference(EXTERNAL);
Sharp GP2Y0A02YK0F Distance Measuring Sensor Module S Test Program
/*
Sharp IR Sensor GP2Y0A02YK0F Test
Basic code for reading the the output of the sensor and converting that to distance
Uses averaging over multiple readings to smooth the readings.
*/
int const IR_PIN = A0;              // analog pin for reading the IR sensor
int const NUM_READINGS_TO_AVG = 10; // Number of readings to average together
float const ADC_VOLTAGE = 5.0;      // Voltage that ADC is operating at.
float ADC_Step;                     // Holds the voltage per step
//===============================================================================
//  Initialization
//===============================================================================
void setup()
{
 // analogReference(EXTERNAL);     // Uncomment this line if using an external ADC reference source
 ADC_Step = ADC_VOLTAGE / 1024;   // calculate the voltage per ADC step
 Serial.begin(9600);              // Set comm speed for debug window messages
}
//===============================================================================
//  Main
//===============================================================================
void loop()
{
 float sum = 0;
 for (int i=0; i<NUM_READINGS_TO_AVG; i++)  // Take the number of readings that you want to average
 {
   sum += analogRead(IR_PIN);
 }
 float volts = sum / NUM_READINGS_TO_AVG * ADC_Step;  // Calculate average * volts per ADC step
 float distance = 65*pow(volts, -1.10);    // Calculate distance from voltage.  Formula attributed to luckylarry.co.uk
 Serial.print(distance);                   // Printout the results to the Serial Monitor
 Serial.print(" cm t");
 Serial.print(distance/2.54);
 Serial.println(" in");
 delay(500);
}
The module has 2 holes that can be used for mounting.
Before they are shipped, these modules are:
- Inspected
- Basic obstacle detection and range finding operation verified
- Packaged in a high quality resealable ESD bag for protection and easy storage.
Notes:
- Take note that once a minimum distance of about 15cm is reached, the voltage will reverse direction and begin to decrease as the distance continues to get shorter, so use care not to misinterpret the results once inside the valid measurement range.
Technical Specifications
| Maximum Ratings | ||
| Vcc | 4.5 – 5.5V (5V typical) | |
| IMax | Maximum Current Draw | 33mA (typical) |
| Operating Ratings | ||
| Frequency | Burst Modulation | 1KHz |
| Burst Frequency | 24Hz | |
| Detection Range | 20cm – 150cm | |
| Measurement Resolution | +/- 10% (typical) | |
| Detection Angle | Unspecified but very narrow | |
| Output Voltage | 0.4V – 2.7V (Typical) | |
| Dimensions | L x W x H | 29.5 x 13 x 21.6mm (1.16 x 0.85″) |
| Country of Origin | China |
Click for Sensor Datasheet

