Mini MP3 and WAV File Player Baseboard
$7.95 – $19.95
Makes Mini MP3 / WAV Player Modules easy to use
Description
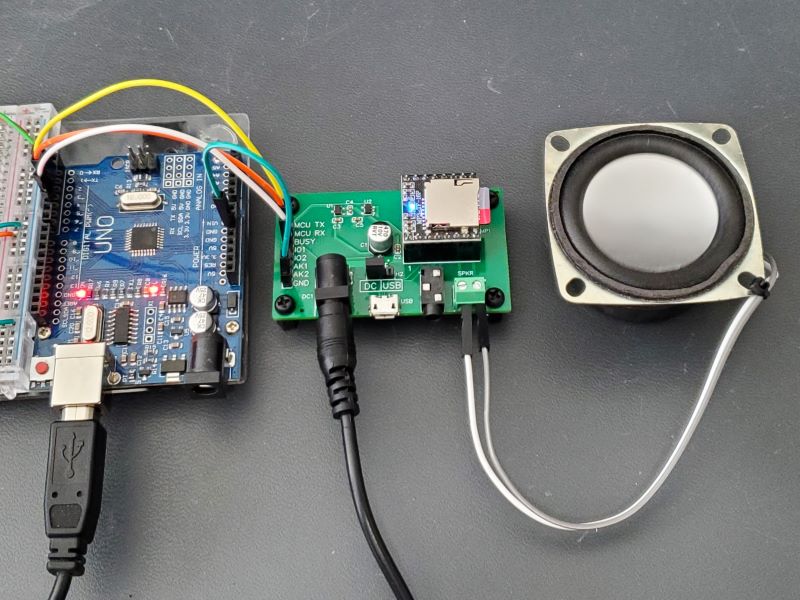
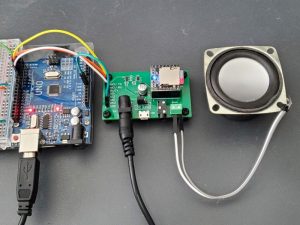
This setup works great for adding sound to a halloween prop or similar project.
The mini MP3 and WAV file players are great little devices, but getting them to work correctly in a breadboard setup while directly driving a speaker can be very difficult due to the large fluctuating power requirements, and wiring up the analog output or USB can be a bit fiddly.
We created this little baseboard to make it easy to work with these small and inexpensive but very useful players and facilitate advanced features such as directly accessing the SD card via a USB cable.
It is available in two versions selectable at top of page:
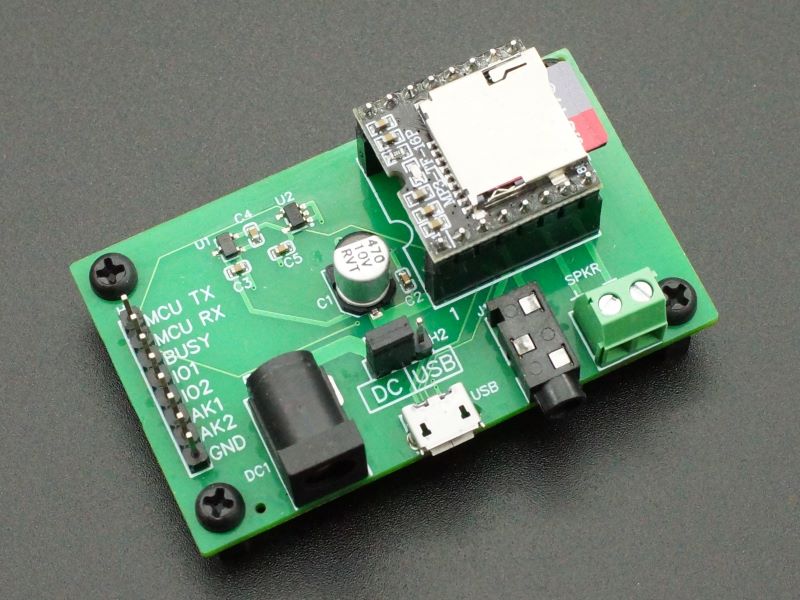
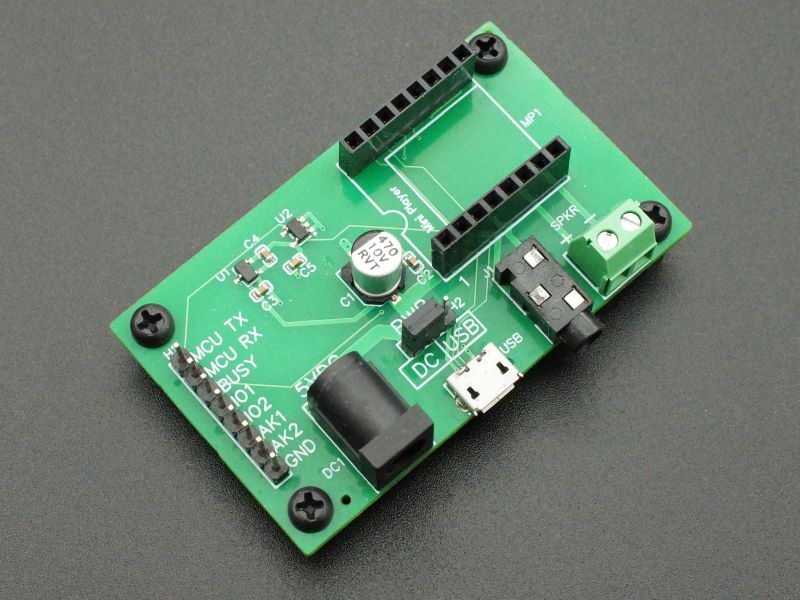
The Baseboard Only comes completely assembled. You’ll need to add a Mini Player, SD card to hold the MP3 / WAV files, a 5V power supply and some type of speaker.
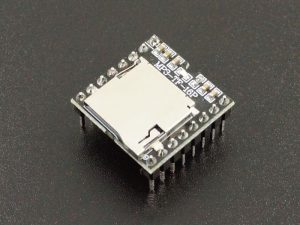
A Fully Stuffed version comes with a Mini Player preinstalled along with a 32GB microSD card which is the largest supported by the module. An SD to micro-SD adapter is included to make it easier to write files to the microSD card using a computer with a standard SD card slot. The microSD card has some free example music and sound effect files preloaded which will work with the example software program at the bottom of the page. You’ll need to add a 5V power source and some type of speaker or headphones.
Package Includes:
- Mini MP3 and WAV File Player baseboard (PSA-10)
- Optionally (PSA-10-FS)
- Mini MP3 and WAV File Player (model MP3-TF-16P / FN-M16P)
- 32GB MicroSD card with preinstalled example MP3 and WAV files
- MicroSD to SD card adapter
KEY FEATURES OF MINI MP3 AND WAV FILE PLAYER:
- Socket for Mini Player module
- 5V power jack to isolate power from the MCU
- Screw terminal connector for direct speaker hookup
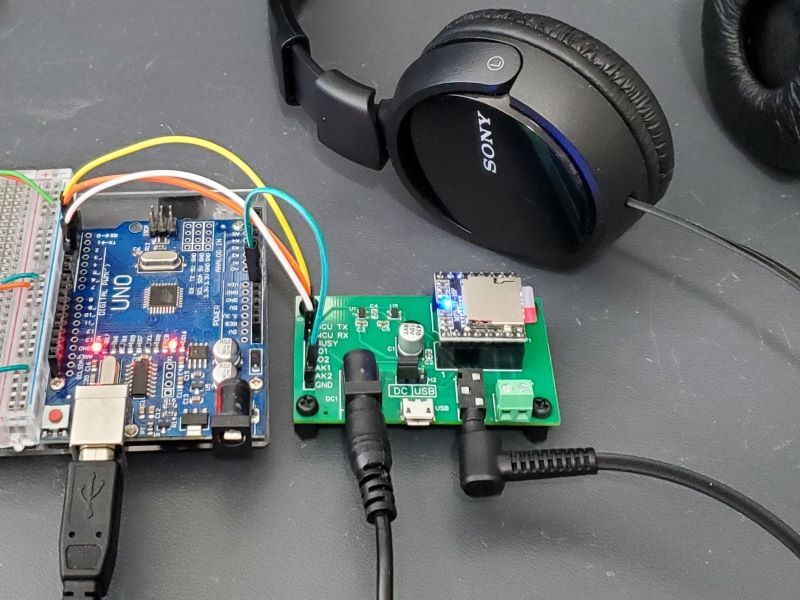
- Phono jack for analog stereo hookup to headphones, powered speakers, or amplifier
- USB Micro-B connector for direct file access to the SD card using a computer
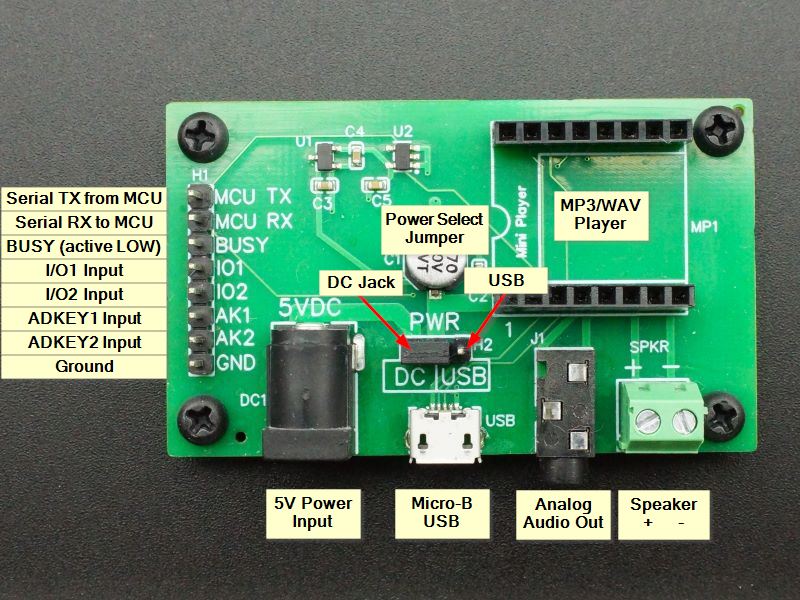
- Power jumper to select either USB or 5V DC jack to power the module.
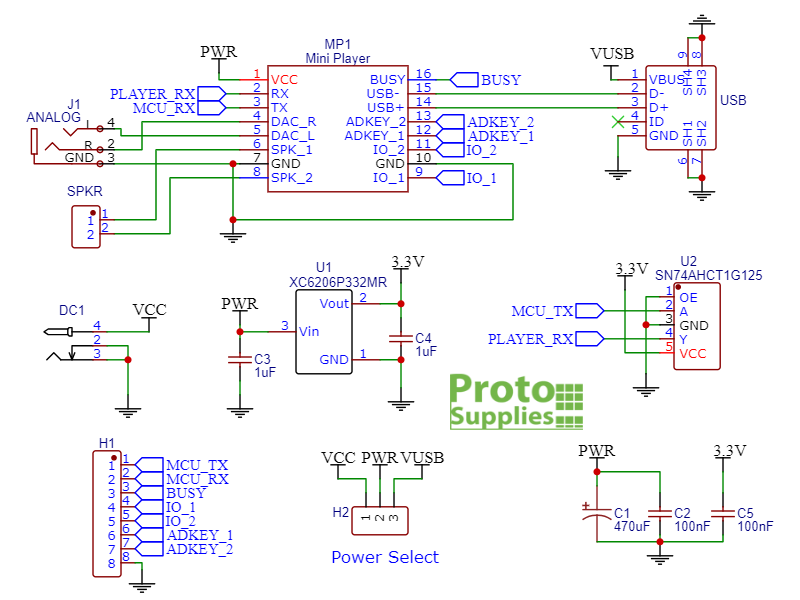
- 3.3V regulator and level shifter on serial RX input for both 3.3 and 5V logic compatibility
- Header pins allow access to various features of the player module
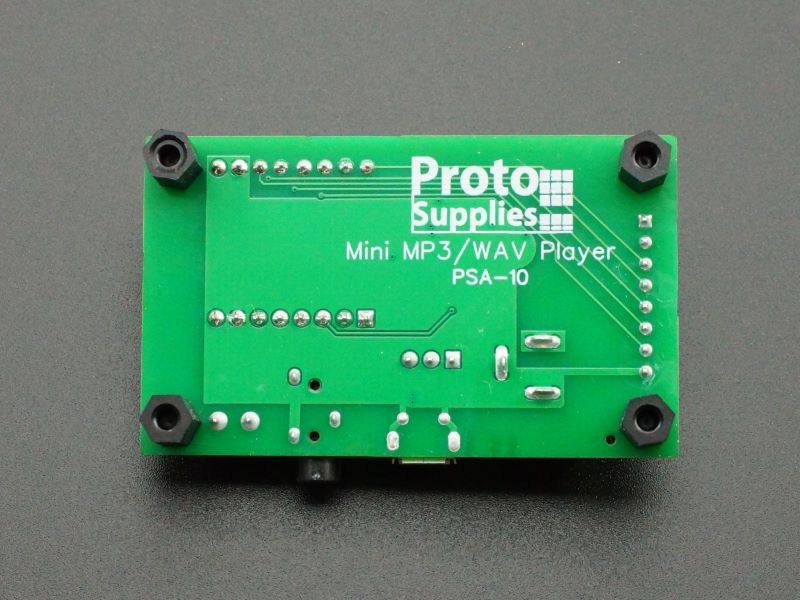
- Nylon standoffs included
- 5V operation
The baseboard was designed and tested using the version of Mini Player that we sell as well as the original DFPlayer Mini sold by DFRobot.
Power Connections
The module must be powered from a 5V source.
DC Power Jack
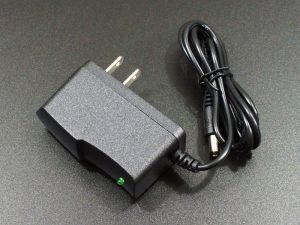
A standard 2.1×5.5mm DC power jack on the board can be used with a 5V AC/DC wall adapter with the power jumper set to the DC input. Almost any 5V adapter will work as long as it can support about 250mA or more. Be sure not to use with a higher voltage than 5V or damage to the Mini Player will result.
Micro-B USB Cable
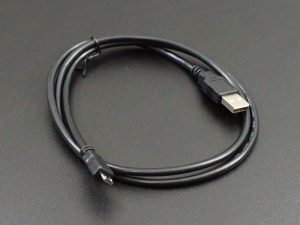
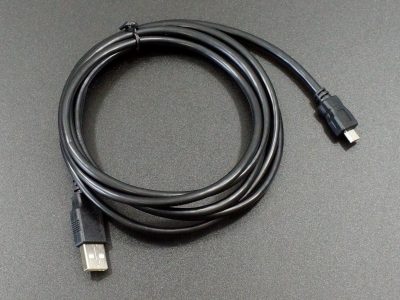
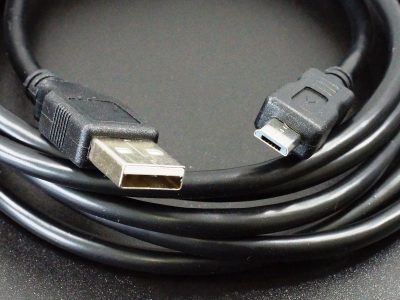
Optionally the module can be powered through a USB cable by setting the power jumper to USB. If the USB cable is a power only (charging) cable, the module will continue to operate normally. If it is a standard USB cable with data lines, the USB connection will be sensed and the module will enter a file mode of operation and operate like a thumb drive for working with files on the SD card from the computer.
Direct Connection To MCU 5V
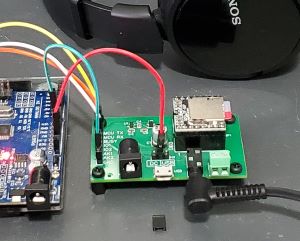
The 3rd way to power the module is by removing the power select jumper and jumping from the MCU 5V to the center pin of the header as shown to the right.
This method of powering the board will work OK when using the analog output such as to drive headphones, but do not attempt to use this method while directly driving a speaker as the power requirement is too great.
Audio Connections
Direct Speaker Output
A screw terminal allows for direct connection of a speaker which is driven by the 3W amplifier IC on the player module. Observe the correct +/- polarity of the speaker.
The speaker can be 3, 4 or 8 ohms and should be able to handle up to 3W. Lower ohm speakers draw more power and will be louder. At full volume the amplifier IC can get quite hot if playing sounds continuously. If using a lower wattage speaker, be sure to keep volume down to avoid possible damage.
The direct speaker connection is most useful when making a simple and compact prop device and where the best sound quality is not required.
Analog Output Stereo Jack
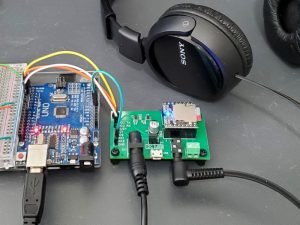
The analog output provides the best quality sound and most flexibility on sound volume if using self-powered speakers. It also allows for additional flexibility in speaker positioning.
Data Connections
Micro-B USB connector
The mini player has a Micro-B USB port which can be used to remotely access the files on the SD card inserted into the player.
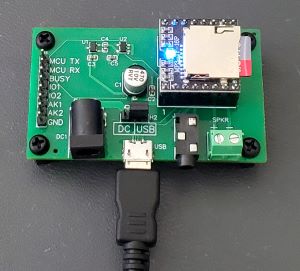
When a USB data cable is connected, the blue LED rapidly flashes and the Mini Player stops playing any files and the SD card now acts like a thumb drive and will show up in the file explorer window as a USB drive. Directories and files can be add or removed just like any USB drive.
If the power jumper is moved over to the USB position, the module can be powered as well as accessed through the USB connection as shown to the right without requiring a separate 5V power supply.
File transfer using the direct USB connection is relatively slow compared to typical USB speeds at about 350KB/s.
Header Pins
An male header provides the interface to an MCU or external buttons for controlling the module.
1x 8 Header
- MCU TX – Connects to MCU TX pin (data coming into the Mini Player board)
- MCU RX – Connects to MCU RX pin (Player data going back to the MCU)
- BUSY – Active LOW output pin signals if player is actively playing a file
- IO1 – Player I/O1 input (provides control using pushbuttons)
- IO2 – Player I/O2 input (provides control using pushbuttons)
- AK1 – ADKEY1 input (provides control using pushbuttons)
- AK2 – ADKEY2 input (provides control using pushbuttons)
- GND – Ground, must be in common with MCU
The MCU TX pin connects to the TX pin on the MCU. On the board it is connected to the Mini Player RX pin. Similarly the MCU RX connects to the RX pin on the MCU and is connected to the Mini Player TX pin on the board. When connecting to an MCU, the MCU TX input has a built-in logic level translator, so direct connections can be made to 5V as well as 3.3V MCUs. The baud rate is fixed at 9600 baud.
The BUSY pin is an active LOW signal that the Mini Player activates when a file is being played. This pin can be monitored to check whether a file has finished playing. Alternatively, the Mini Player can be queried over the serial port for playing status.
The I/O and ADKEY pins allow for physical pushbuttons to be used to control the Mini Player without the use of an MCU. The functionality is fairly constrained and so not overly useful in most applications. Refer to the Mini Player datasheet for information on using the I/O and ADKEY pushbutton inputs.
Refer to the Mini Player page for additional technical information on the Mini Player itself.
MicroSD card Files and Folders
The Mini Player supports up to a 32GB MicroSD card for file storage.
A couple of different file/folder schemes are supported which are detailed on the Mini Player page, but in our example at the bottom of this page we are using the one where files are placed into named folders as it is the most versatile. In this use case, one or more folders (up to 99) are created to hold the files. The folders must be named sequentially 01, 02, 03….99. Each folder can hold up to 255 files. Note that the folder name must be 2-digit, so the leading zero is required.
The files placed into those folders must also be sequentially named. The first file would be named 001.MP3 (or 001.WAV) up to 255.MP3 (255.WAV). Note that the file name must be 3-digit, so the leading zeros are required to pad.
The nice thing about using this method is that the file number can be prefixed onto an existing file name. So instead of 001.MP3, it could be 001Zombie Screams.MP3 which makes it much easier to keep track of the different files.
With 99 folders each holding up to 255 files, in theory you can store up to 25,245 files. Maximum number of files will also depend on file sizes, type and microSD card capacity. The WAV file format takes up more space than MP3 formatted files. In any case a 32GB microSD card holds a lot of data, so storage capacity is not typically an issue.
The format of the command to play the file using this method is player.playFolder(folder, file); ‘player’ is whatever name that has been assigned to the DFRobotDFPlayerMini object that is created. The leading zeros can be ignored when issuing the play commands.
To play the 007Squeaky-Gate.MP3 in folder 01 for example, the command would be player.playFolder(1,7);
Our Evaluation Results:
Adding music or sound effects to a project is a common desire, especially when working with something like a Halloween prop and these make it cheap and easy to do and can be controlled by virtually any MCU.
One of the nice things about these modules is that they can be commanded to play a file through a simple serial command and then the MCU is free to go off and do other things. It can check the BUSY line to see the current play status of the module or can query the module through serial. Having a built-in amplifier and being able to directly drive a speaker can also be quite handy for many applications.
The most common library to use with these modules is the DFRobotDFPlayerMini.h library, those there are a couple others and it is also possible to directly control the module using the information on the Mini Player datasheet.
The example program below illustrates a basic setup to play selected files from the SD card and adjust the volume and equalizer settings on the fly. The files to be played should be sequentially named ‘001’ or have 001 added as a prefix to the current file name, ‘002’, ‘003’ and up to ‘255’. The files should be placed inside a directory named ’01’. This file structure is already setup on the Fully Stuffed version of the product with 8 total files, 4 music and 4 sound effects. Change this line to match the number of files you add const int NUM_FILES = 8;
It uses pins 2 & 3 along with SoftwareSerial library for serial control and is monitoring the BUSY output on pin 5 to automatically play the next file once it ends. Hardware serial can be used instead.
To hear the sound, you will need to hook-up headphones or a powered speaker like a PC speaker to the phono jack or connect a speaker to the speaker pins as well as a 5V power source.
Mini Player Example Program
/*
  Mini MP3 and WAV File Player Example Program for Baseboard

  This program  initializes the player and allows user to select file
  volume and equalizer settings

  Create a directy 01 on the SD card
  Add an MP3 or WAV sound file to the 01 directory that has been renamed
  to 001 or you can add 001 to the front of the file name.  Add more files
  with sequential 002, 003, etc on the front of the file name.

  We are using SoftwareSerial so that we can use any 2 convenient pins
  Just be sure that the pin used for RX on the MCU has interrupt capability.
  We are using pins 2 & 3 which support interrupts on Uno
  RX is digital pin 2 (connect to MCU RX of board)
  TX is digital pin 3 (connect to MCU TX of board)

  We have the BUSY output connected to MCU pin 5 to monitor play state.

  Set serial monitor to 115200 baud and Newline only or Both NL & CR line ending

  Typing P1-P255 and hitting return on the Serial Monitor window will select
  the file to be Played.  It assumes files are in directory 01

  Typing V0-30 and hitting return on serial monitor window will set
  the Volume to that level.

  Typing E0-E5 will set the equalizer value to that setting

  Uses the DFRobotDFPlayerMini and SoftwareSerial libraries or can use
  hardware serial port
*/
#include "DFRobotDFPlayerMini.h"
#include "SoftwareSerial.h"

#define UNO_RX_PIN    2         // Define pins to use for serial port
#define UNO_TX_PIN    3
#define PLAYER_BUSY_PIN 5       // Busy input pin
#define NUM_FILES 8             // Number of files on SD card.

char *equalizerArray[] = {"Normal", "Pop", "Rock", "Jazz", "Classic", "Bass"};
const byte numChars = 5;        // Maximum number of characters in command
const char receivedChars[numChars];   // Array to store the received data
boolean newData = false;        // Flag when full command received
int play = 1;                   // Initially play first file '001'

// Create the serial port object
SoftwareSerial playerSerial(UNO_RX_PIN , UNO_TX_PIN);  //RX, TX

// Create the Player object
DFRobotDFPlayerMini player;
//===============================================================================
//  Initialization
//===============================================================================
void setup() {
  // Init USB serial port for user input
  Serial.begin(115200);
  // Init serial port for DFPlayer Mini
  playerSerial.begin(9600);

  // Setup input pin to monitor busy output pin of module and enable pullup.
  pinMode(PLAYER_BUSY_PIN, INPUT_PULLUP);

  // Start communication with the Mini Player
  if (player.begin(playerSerial)) {  // Returns TRUE if successful
    Serial.println("Player OK");
    // Set initial volume (0 to 30).
    player.volume(25);
    // Play first file starting with 001 in folder 01
    player.playFolder(1, play);
    Serial.print("Now Playing: "); Serial.println(play);
    delay(2000);  // Wait for the player to start playing
  } else {        // Returns FALSE if unsuccessful
    Serial.println("Connecting to Mini Player failed!");
    while (-1); // go no further if no connection
  }
  Serial.println ("Type V0 to V30 to control Volume");
  Serial.println ("Type P1 to P255 to Play selected file");
  Serial.println ("Type E0 to E5 to select Equalizer type");
}
//===============================================================================
//  Main
//===============================================================================
void loop() {
  if (Serial.available() > 0) {
    RecvWithNL();           // Read a character from the serial port
    if (newData == true) {  // '/0' received indicating complete command received
      ExecuteCmd();         // Execute the command
      newData = false;
    }
  }

    // if the busy pin goes HIGH, the file has ended, so auto play the next file
    if (digitalRead(PLAYER_BUSY_PIN) == HIGH) {
      if (++play > NUM_FILES) play = 1;
      player.playFolder(1, play); // Play next file
      Serial.print("Now Playing: "); Serial.println(play);
      delay(2000);  // Give player time to start playing before checking BUSY pin
    }
}
//===============================================================================
//  ExecuteCmd - Executes the command typed in the Serial Monitor Window
//===============================================================================
void ExecuteCmd()
{
  char cmd;   // Command received 'V', 'P' or 'E'
  int value;  // Value assigned to command

  cmd = receivedChars[0];    // First character is the command to execute
  char *dat = receivedChars; // Set pointer to command string
  value = atoi(++dat);       // Point to value after cmd and convert to integer

  switch (cmd) {
    case 'v': // Volume (format V0-V30)
    case 'V':
      if (value > 30) value = 30;       // Cap at 30
      else if (value < 0) value = 0;    // Limit to 0
      player.volume(value);
      Serial.print("Volume: "); Serial.println(value);
      break;

    case 'p': // Play (format P1-P255)
    case 'P':
      if (value > NUM_FILES) value = NUM_FILES; // Cap at maximum # of files
      else if (value < 1) value = 1;            // Limit to 1
      play = value;
      player.playFolder(1, play);
      Serial.print("Now Playing: "); Serial.println(play);
      delay(2000);  // Give player time to start playing before checking BUSY pin
      break;

    case 'e':   // Equalizer Setting (format E0-E5
    case 'E':
      if(value > 5) value = 5;
      else if (value < 0) value = 0;
      player.EQ(value);
      Serial.print("Equalizer: "); Serial.println(equalizerArray[value]);

    default:
      break;
  }
}
//===============================================================================
//  RecvWithNL - Packs incoming serial characters into a command string
//               Sets newData = true when complete command received
//===============================================================================
void RecvWithNL() {
  static byte ndx = 0;      // Index for current location in command string array
  char endMarker = '\n';    // End character for command string is newline
  char rc;                  // Character being read from serial port

  if (Serial.available() > 0) {
    rc = Serial.read();     // Read character from serial port
    if (rc != endMarker) {  // if not newline, add character to array
      receivedChars[ndx] = rc;
      ndx++;
      if (ndx >= numChars) {  // Limit size of string array if extra chars received
        ndx = numChars - 1;
      }
    }
    else {
      receivedChars[ndx] = '\0'; // terminate the string with NULL
      ndx = 0;
      newData = true;           // Set flag so we know complete command received
    }
  }
}
Before they are shipped, these modules are:
- The Fully Stuffed version are each tested.
Further Reading:
DFRobot DFPlayer Mini Wiki with useful information on using these types of modules with their software library
Refer to the Mini Player page for additional technical information on the Mini Player itself.
Refer to the Mini Player datasheet for information on using the I/O and ADKEY pushbutton inputs.
Notes:
- Do not exceed 5V power
Technical Specifications
| Operating Voltage | 5VDC | |
| DC Power Jack | 2.1 / 5.5mm | |
| USB Port | Micro-B USB 2.0 | |
| UART Port | 3.3V or 5V TTL Level Serial Port | |
| PCB Dimensions | 63.5 x 38.1mm (2.5 x 1.5″) | |
| Assembled Height w/ standoffs | 24mm (0.95″) | |
| Country of Origin | Designed in USA | Manufactured in China |
| Mini Player Mfr | Flyron Technology | |
| Mini Player Datasheet |
Embedded MP3 Audio Module |

