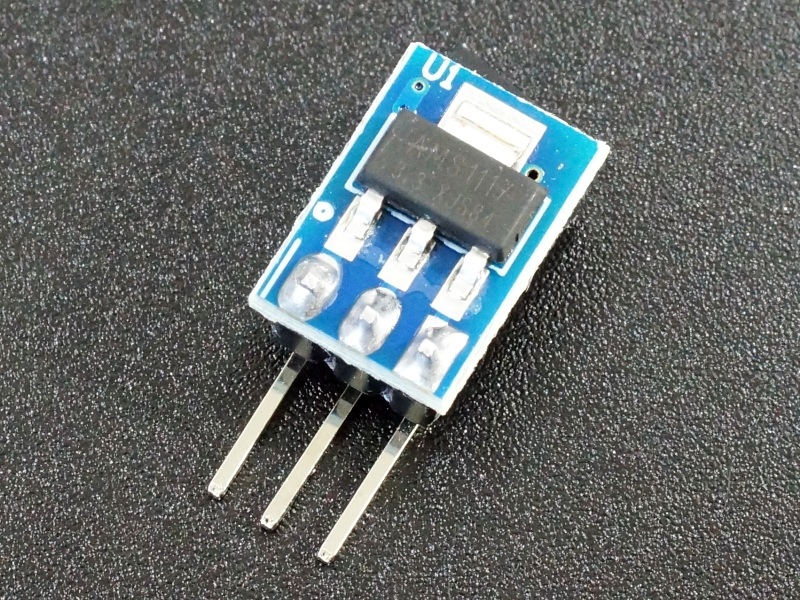
AMS1117 5V to 3.3V Step-Down Regulator Module
$0.59
Compact module for creating 3.3V on 5V breadboards.
63 in stock
Description
The AMS1117 5V to 3.3V Step-Down Regulator Module provides a convenient way for providing 3.3V on 5V breadboards.
PACKAGE INCLUDES:
- AMS1117 5V to 3.3V Step-Down Regulator Module
KEY FEATURES OF AMS1117 5V TO 3.3V STEP-DOWN REGULATOR MODULE:
- 3.3V Output
- 5V Input. Can use higher input voltages, but see our notes below about derating the current at higher voltages
- 800mA maximum rated current. 500mA recommended max
- Power LED
- Short circuit and thermal protection built-in
- Small footprint
This little module is based on the AMS1117-3.3 regulator and is a convenient way to drop 5V down to 3.3V. Inputs higher than 5V can be used, but refer to our derating notes below.
The AMS1117-3.3 has built-in short circuit and thermal protection features which makes it fairly robust as it tends to safely shutdown when abused rather than bursting into flames.
The module has a red power LED when power is applied.
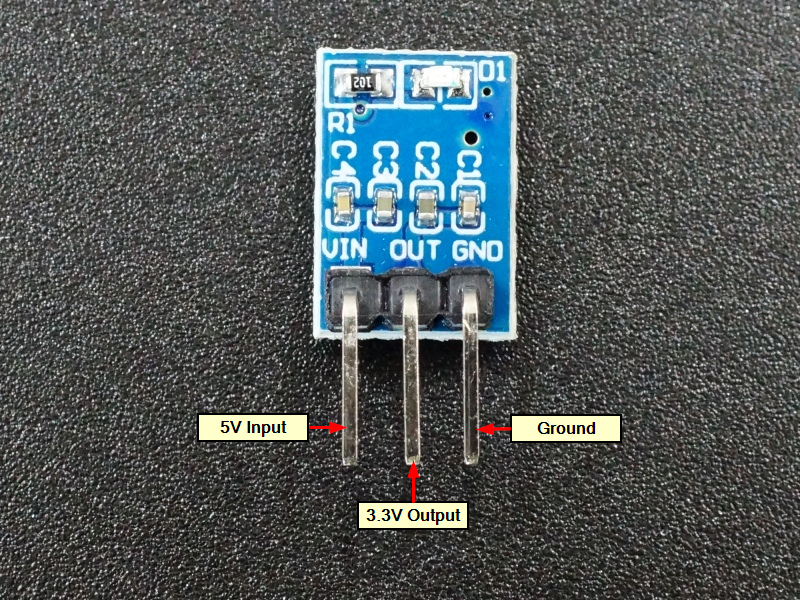
Module Connections
There is a 3-pin right angle header for making connections.
1 x 3 Header
- VIN = Connect to 5V
- OUT = 3.3V Output
- GND = Connect to ground
OUR EVALUATION RESULTS:
These are nice little modules that make it easy to have a source of 3.3V for a project.
While the chip is rated for 800 mA with a 5V input, the tiny module does not have enough heat sinking to hit that number for long. In our testing, after about 5 minutes at 800 mA the device safely went into thermal shutdown. At 700 mA, it got hot (120C on tab) but kept chugging along OK. Probably best to consider it a 500-600 mA max device.
It is possible to use a higher input voltage than 5V, but as with any linear regulator, the power dissipation of the regulator is dependent on the difference between the input voltage and the output voltage along with the amount of current that is being drawn from the regulator.
The larger the difference between the Vin and Vout, the higher the power dissipation which limits how much current can be drawn from the device. As you can see in the chart below, the usable current goes down rapidly as the input voltage increases. These are best suited for 5V operation unless your current requirements are small. At 9V current should be limited to about 200 mA and at 12V the current should be limited to about 75 mA
Output Current vs Input Voltage
| V In | V Out | Tab Temp | Current (ambient 22C) |
| 5V | 3.3V | 120C | 700A |
| 5V | 3.3V | 105C | 600A |
| 5V | 3.3V | 95C | 500A |
| 9V | 3.3V | 95C | 200mA |
| 12V | 3.3V | 98C | 75mA |
One thing to be aware of whenever using any breadboard friendly power module is that while the module may be able to handle 500+mA, the typical breadboard jumper wires will have a fairly significant voltage loss passing that much current on both the input and output sides of the module. This is most important on the output side, since we are trying to lose some of the voltage on the input side anyway.
When using with higher current loads you may need to double-up on the wires or use heavier gauge wires on both the input and output voltage connections to minimize the voltage drop.
BEFORE THEY ARE SHIPPED, THESE MODULES ARE:
- Sample inspected and tested per incoming shipment.
Notes:
- Under high current loads or with large input to output voltage differentials, the tab can get hot, so use care when handling.
Technical Specifications
| Maximum Ratings | ||
| VIN | Maximum Input Voltage | 12V (5V Typical) |
| IO | Maximum Output Current | 700mA (5V Input) |
| IPEAK | Peak Surge Current (typ) | 800mA (5V Input) |
| Operating Ratings | ||
| VO | Output Voltage | 3.3V |
| IO | Recommended Max Output Current | 600mA |
| Dimensions | L x W PCB | 13 x 9mm |
| Country of Origin | China |


